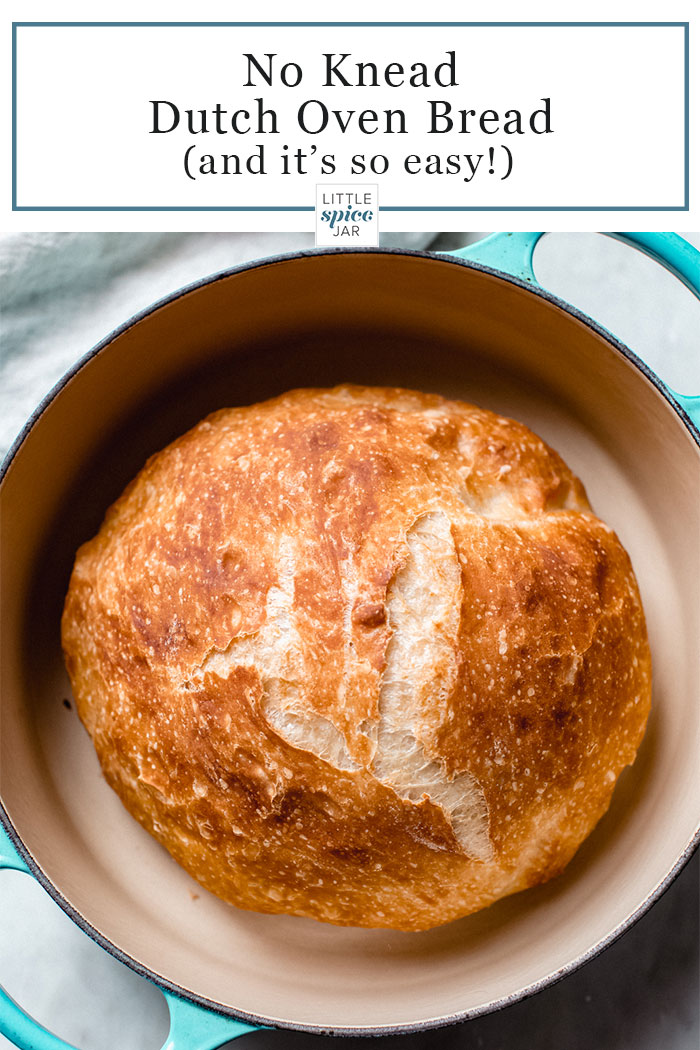
Easy No Knead Bread
Just four simple ingredients to make homemade no knead bread. This dutch oven bread requires barely any work, and you don’t have to be an expert in bread making for it!

I have made no knead bread in my dutch oven more times than I can count this week.
I have a super dysfunctional relationship with bread lately. Don’t know what it is. Actually, I know exactly what it is. It’s a submissive relationship. I see bread; I eat bread. Okay, maybe it’s not quite that dramatic. But I do go through bouts of bread making and eating sometimes. It certainly is comfort food for me. The story of my life: 50 Shades of Carbs 🙋🏻♀️
Moving along.
This dutch oven bread has been a tough nut to crack. It threw me for a loop there a few times before I settled on a recipe. And then, I started playing with it all over again because of the current yeast shortage. I wanted to use less yeast in the recipe and also streamline the process, so it required no refrigeration at all. Just a simple mix, cover, and go scenario, and I’ve got it down perfectly now!

Instead of asking me what I love about no knead bread, ask me what I don’t love; the list would be much shorter. Maybe it’s the soft and chewy centers or the crisp outer crust. Maybe it’s the fact that it makes my entire house smell like the corner bakery. Perhaps it’s the one bowl no-knead part.
It’s just all of it.
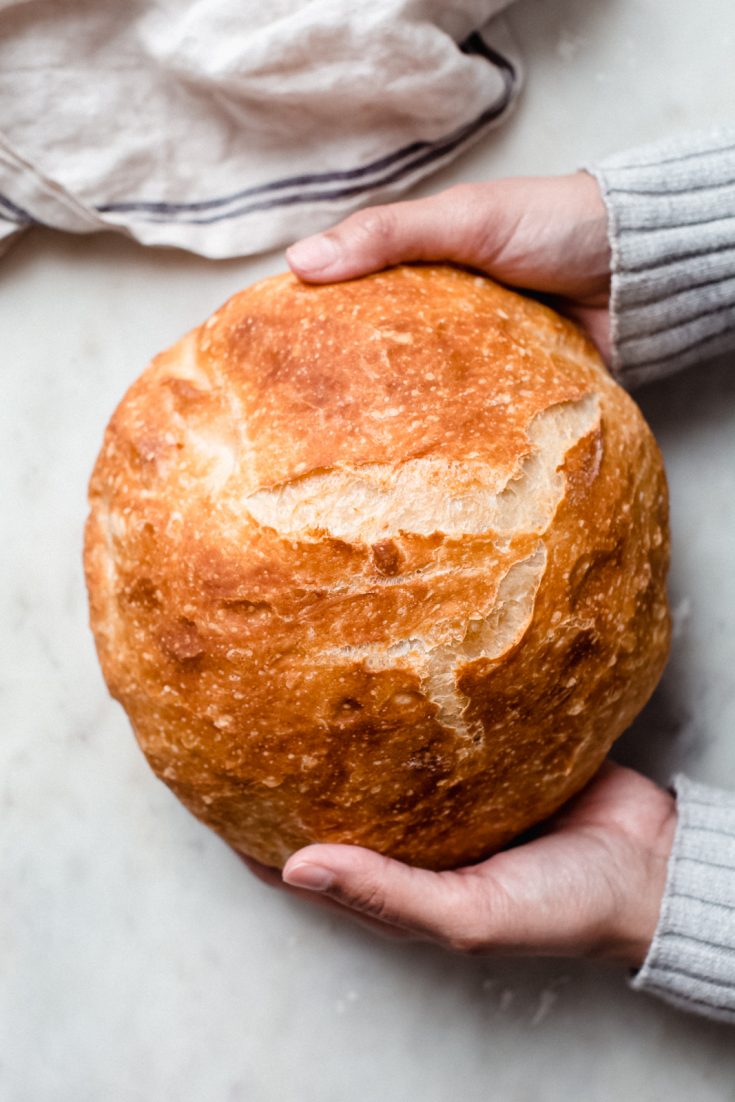
To tell you the truth, this bread reminds me of the large boules you find in the basket of your favorite mom and pop bakery. All I want is a schmear of European butter and a teaspoon of my favorite preserves to complete things.

What is dutch oven no knead bread?
No knead bread is made with dry yeast, which produces carbon dioxide gas naturally during the fermentation stage, which then causes it to rise. It’s different from quick bread like soda bread that use baking soda or powder to provide the carbon dioxide to aide the dough in rising.
What do you need to make no knead bread?
- Warm water: One thing to keep in mind is that if you do decide to use all-purpose flour, you will need two tablespoons less water for the bread mix. This is because of the lower protein content of the all-purpose flour. The higher the protein content in the flour, the more water it will absorb.
- Active dry yeast: originally, this recipe called for one tablespoon of yeast. But after making it more than a dozen times since I first hit publish, I’ve come to realize you can get away with using less yeast.
- Kosher salt: The primary function of salt is obvious to flavor the dough. But the salt also plays another role. It also determines the swelling capacity of gluten. Adding too much salt would reduce the amount of carbon dioxide produced and result in a flat loaf. The opposite would be true with too little salt. The dough would rise too rapidly.
- Bread flour: the original recipe I shared uses all-purpose flour, and though that would work, I explain below why I’ve made the switch. Regardless of which flour you use, be sure to spoon the flour into your measuring cup rather than scooping directly with the measuring cup.

What kind of flour do you suggest using, I have both
If you have the option of choosing between bread flour and all-purpose, it’s a no brainer to go with the bread flour. It’s the ideal flour to use when baking bread.
If you’d let me, I’d like to geek out on you for a second. Bread flour has a higher protein content compared to all-purpose, and the additional protein is required when making bread to produce more gluten. The elasticity of bread comes from gluten, and that chewy texture we love from a good boule is because of gluten development. The high gluten content in bread flour delivers a crispy, crunchy outer crust while still keeping that soft and chewy center we love. It’s exactly the same reason why I like to use bread flour when I’m making Detriot-style pizza.
How to make no knead bread in your dutch oven:
- Combine the ingredients. The night before you want to bake the bread, combine the flour, salt, yeast, and water in a large bowl. I use a dough whisk to mix them in this bowl. You could also do this with a wooden spoon. Then, just cover the bowl with plastic wrap and allow the dough to rise for 12-18 hours at room temperature.
- Shape the dough. When you’re ready to shape the loaf, dump it out onto a lightly floured work surface and shape the dough into a round ball. Place it on a sheet of parchment paper, score the top of the dough with a small slit at the top (just 1/8 of the way through so the steam escapes) cover it with plastic (or I just invert the bowl on top) and allow the dough to rest. Preheat the oven and the dutch oven at this time.
- Bake the bread. When the oven is hot, remove the dutch oven from the oven using oven mitts and carefully place the parchment paper inside the pot. Cover and bake for 30 minutes. Then, remove the lid and continue to bake until the bread browns to your liking. Allow the bread to cool completely before slicing.

What is the secret to no knead bread?
The secret(s) to making great no knead bread are simple.
- The first thing is a longer fermentation time. Since we’re allowing the dough to rest for such a long period, we don’t need the full tablespoon of yeast that I used previously in this recipe. So I’ve cut it way, way down to ½ teaspoon. The longer fermentation allows us to not only use less yeast, but it also gives this recipe a much more delicious, sourdough-like flavor.
- Using a hot vessel to bake the bread.
What dutch oven do you suggest using?
I own a variety of dutch ovens, so I put a few to the test for this recipe. You could use something as small as a 4-quart dutch oven or as large at a 6 quart for this recipe. I’ve used this 5-quart Lodge that is a budget purchase and works well. Most days I use by 4-quart cocotte that is a workhorse in my kitchen. The key to all of this is using a vessel that has a thick, heavy bottom pot that has an oven-proof lid (at least 450ºF) that will retain heat so that the bread cooks quickly and evenly.

Faq’s about homemade bread:
- Is it safe to use parchment paper at such a high temperature? To be safe, check the packaging on your parchment paper; the one I purchase says 450ºF, so it works just fine.
- How do you store the bread? Store it wrapped in plastic wrap then keep it in an airtight container at room temperature. Bread will last for three days, after three days you can dice it up and make croutons!
Variations for no knead bread:
- Cranberry Walnut: stir in ½ cup of chopped walnuts and ½ cup of cranberries when you’re preparing the dough
- Fresh Herbs and Pepper: 2 teaspoons of minced fresh thyme and two teaspoons of freshly minced rosemary along with a generous grinding of pepper
- Caraway bread: add two or three teaspoons of caraway seeds when you’re mixing the dough.
- Jalapeño: ¼ cup of pickled jalapeños that you dried on a napkin and minced would add such a delicious flavor to the dough. Be sure to dry out the jalapeños completely before adding them to the dough. You could even add a sprinkling of garlic powder!
- Lemon Thyme Bread: add one tablespoon of minced thyme and minced lemon peel
Other homemade bread recipes to try:
- Jalapeno Cheddar Bread
- Honey Oat Bread
- Roasted Garlic Rosemary Focaccia
- 1-hour Dinner Rolls
- Garlic Irish Cheddar Chive Soda Bread

Easy No Knead Bread
Just 4 simple ingredients to make my homemade no-knead bread! This dutch oven bread requires barely any work and you don’t have to be an expert bread maker to make good bread. Stop paying for bread when you can make it at home!
Ingredients
- 1 ½ cups + 2 tablespoons water (105ºF works best, see notes)
- ½ teaspoon active dry yeast
- 1 ½ teaspoon kosher salt
- 3 cups + 2 tablespoons bread flour (or all-purpose)
Instructions
- MIX: The night before you plan on baking the bread, combine the water (see notes), yeast, flour, and salt in a large bowl. Stir together using a wooden spoon or a dough wand until the dough comes together without any flour pockets remaining. Loosely cover the bowl with plastic wrap and set aside for 12-18 hours at room temperature.
- SHAPE: When you’re ready to bake the loaf, lightly flour a clean work surface and dump the dough out onto it. Turn the dough onto itself once or two times to smooth it out. If it’s very wet or tacky, you can add a small pinch of flour to help it, then shape it into a circular lump. Place on to a piece of parchment paper with the seam side down. Lightly flour the top of the dough ball, score the dough using a knife, and cover it with a bowl or plastic wrap and allow the dough to rest for 35-45 minutes. While the dough is resting, preheat the oven.
- PREHEAT: Position a rack in the center of the oven (depending on the size, you may need to remove a rack to accommodate the dutch oven) and place a covered dutch oven on the rack. Preheat the oven to 450ºF with the empty dutch oven inside. Give the oven at least 30 minutes to heat if you don’t have an oven thermometer set up to where you can check the internal temperature. When the oven has preheated, carefully remove the dutch oven using oven mitts. Lift the lid, set aside, and carefully place the parchment paper (and the dough ball resting on it) inside the dutch oven.
- BAKE: Cover with the lid, and using mitts, transfer it back into the oven. Bake the bread for 30 minutes. Then, remove the lid from the bread and continue to bake it for an additional 12-15 minutes or until the crust of the bread is golden (longer for a dark golden, and more crispy bread; less time for a light golden and softer center.) Remove from the oven, and carefully lift the parchment paper and place it on a wire cooling rack. Allow the bread to cool for at least 45-60 minutes before slicing!
Notes
- If using all-purpose flour, you will need 1 1/2 cups of water. If using bread flour, you will need 1 1/2 cups + 2 tablespoons of water for this recipe.
- STORAGE: Store the bread wrapped in plastic wrap then keep it in an airtight container at room temperature. Bread will last for 3 days, after 3 days you can dice it up and make croutons!

I can’t believe how fantastic this bread came out, and so easy!! 5 stars. Thank you!
Glad you enjoyed it Susan! 🙂
Do you have to refrigerate the dough? Or could you bake it right after letting it rise?
You can bake it right away if you’d like!
I always bake right after letting it rise, haven’t needed to refrigerate it. Comes out spectacular!
Hi Mariza, I made this bread today, I have never made bread before, it was easy and nice. The parchment paper was stuck to the bread and was difficult to remove. I did dust the paper with flour..
Hi Jen! Glad you found the recipe easy to follow! Hmm.. you could try spraying it with a little nonstick cooking spray instead of dusting it with flour next time. That might do the trick.
Would the convection setting on the oven change the cooking times at all?
Yes it would. Convection ovens usually require less time to bake things than regular ovens.
This went with our soup supper tonight, and was really delicious. It looked just like your photos, and had a great chewy crust, which I love. It was a little on the salty side, so I might try it with less salt next time. Thanks for a great recipe!
Well that was easy!
This was the easiest bread I have ever made… truly!
I moved from Canada 28 year ago to The Bahamas and while I love hot Bahamian Bread… this is the bread I grew up eating in my Italian / Slovenian home… crusty on the outside.. soft and moist on the inside. Thank you for sharing this recipe and transporting me back to my childhood.
As a new year’s challenge, I want to try cooking or baking something I’ve always wanted to make but was too scared to try. I am a very good baker but the concept of no kneading the dough and baking in a dutch oven scared me for years. I’m glad I took a chance as it was simple and turned out fantastically! Thanks for sharing!
What if I don’t have a Dutch oven like that? Do you think a 12 qt camping style cast iron Dutch oven would work?
Yes, I think it should work as long as it’s cast iron! You just need a vessel that retains heat really well. But because of the additional surface area (being a 12 quart), it might be done a little faster than if you were to use a smaller dutch oven.
I only have a 5 quart Dutch Oven, should I split it in two or will it work in the smaller pot? If I do it in the 5 qt should I increase the time? By the way I love your recipes!!
It will work in a 5 quart as well. Recently tested it without any issues ?
I only have instant yeast. Will that work in the No Knead Bread recipe? Thank you!
Yes, you can use that! I would just use ¼ teaspoon if you have instant yeast, everything else will remain the same!
I have been wanting to try bread baking and this looks like the recipe for me! I don’t have kosher salt can I use table salt?
Hi Toni, table salt will work but you’ll want to use 1 teaspoon instead of the 1 1/2 teaspoons listed so it’s not too salty.
I’m a bit worried about the handle on the lid of my pot. Do you think it would work if I covered the pot in aluminum foil instead? Thank you.
Hi Melanie! Unfortunately, aluminum foil won’t allow the bread to steam the way we want it to for the first 30 minutes of baking. Instead, I suggest using a baking sheet, placed flat on top of the pot (during preheating) and then again while you’re baking the bread. The hot pan and pot will allow the bread to steam and puff up. Hope that helps!
For those with LeCreuset dutch ovens, you may want to consider replacing your black “phenolic” knobs with Stainless steel ones. A small investment but definitely worth it (unless you want to hear that rather loud and disturbing noise when the knob finally cracks and falls off in the oven). My original knob was only rated to 400 degrees and repeated uses at 450+ caused its demise. The stainless steel replacement knob (available either from LeCreuset or Amazon) is rated for any oven temperature.
I’ve wanted to bake this this kind of bread for quite a while. However, my parchment paper states 425 degrees on the website I purchased it from. Will this be an issue? I have not located a 450 degrees parchment paper.
Here’s one that’s safe up to 450ºF if you’d like to purchase. The other option is dusting a clean work surface with cornmeal and placing the bottom of the loaf on it so it picks it all up. Then, you’d very carefully place the loaf directly in a warmed dutch oven. This does add a bit of texture to the bottom of the bread but is a good alternative!
Thank you very much! I will order this today.
Kathy
A 1/4 teaspoon of instant yeast worked great! The dough was so sticky my loaf wasn’t as round as I would have liked, but it tasted incredible! Thank you for another terrific recipe!
Glad to hear that! For next time, you can add in an additional tablespoon of flour while shaping the dough and that should solve the stickiness issue ?
Would it be okay to use whole wheat flour instead?
How much whole wheat flour can I add to Bread Flour to make this recipe more nutritious??
Thanks, annie
Hi Annie! I’m so glad to hear you’d like to give this recipe a try! Unfortunately, swapping the bread flour for whole wheat flour would require additional recipe testing. If you decide to give it a go, I’d suggest playing around with the water, my best guess is that it will need additional water to bring the same amount of flour together. Or you can cut back slightly on the whole wheat flour. Hope that helps!
One of the best bread recipe i ever tried. The instructions are so clear and precise. Ithink i will not buy bread again after tasting this. Thank you. Can i put cream cheese and strawberry jam to make it more attractive to kids?
It turned out perfect the first time., and dinner guests thought it delicious. Also, was really good second and third time I made it. Thank you.
So happy to hear it was enjoyed by all, Nancy! Appreciate you circling back to leave a review 🙂