Roasted Garlic Rosemary Focaccia Bread
Roasted garlic-scented rosemary focaccia bread is perfect for pasta night or when you’ve got guests coming! If you’re looking for something new to make during the holidays, let this rosemary focaccia bread be it. Follow the step-by-step recipe and see how easy it is to make!
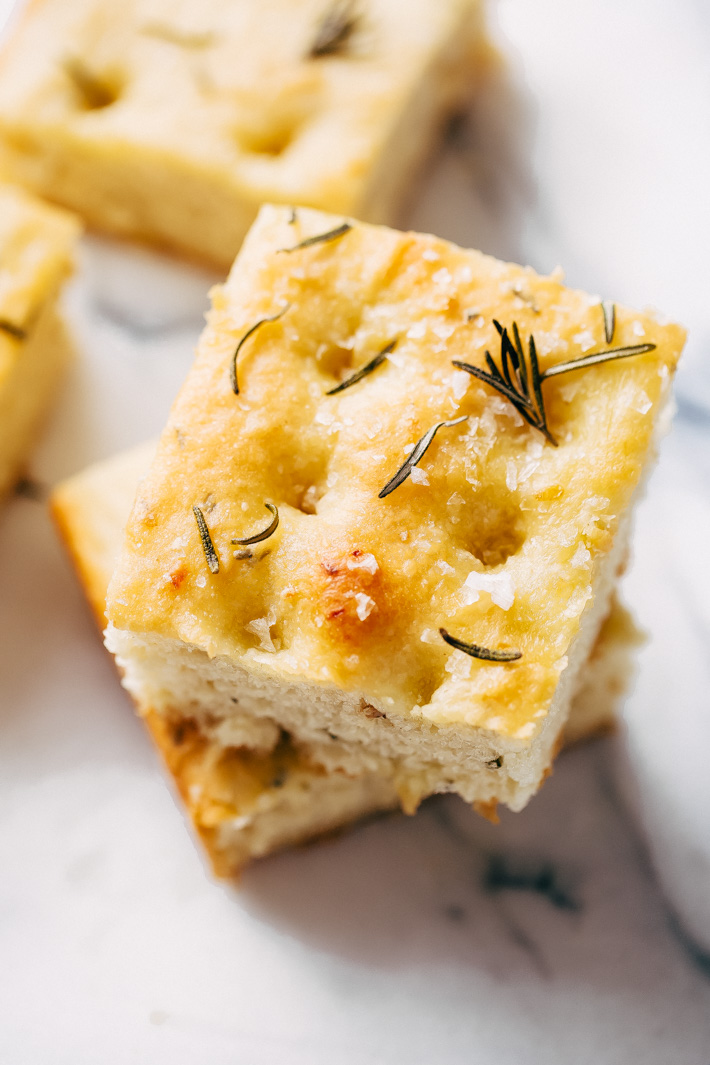
Friends, carb lovers, and soup enthusiasts, lend me your… eyes?
Okay, not too sure where I was going with that one. Maybe it’s the carbs talking? All I can presently think about is the way that roasted garlic smells when it’s mingling with rosemary and good olive oil. My heart does a little summersault as the focaccia bread bakes away unleashing the most delightful aroma.
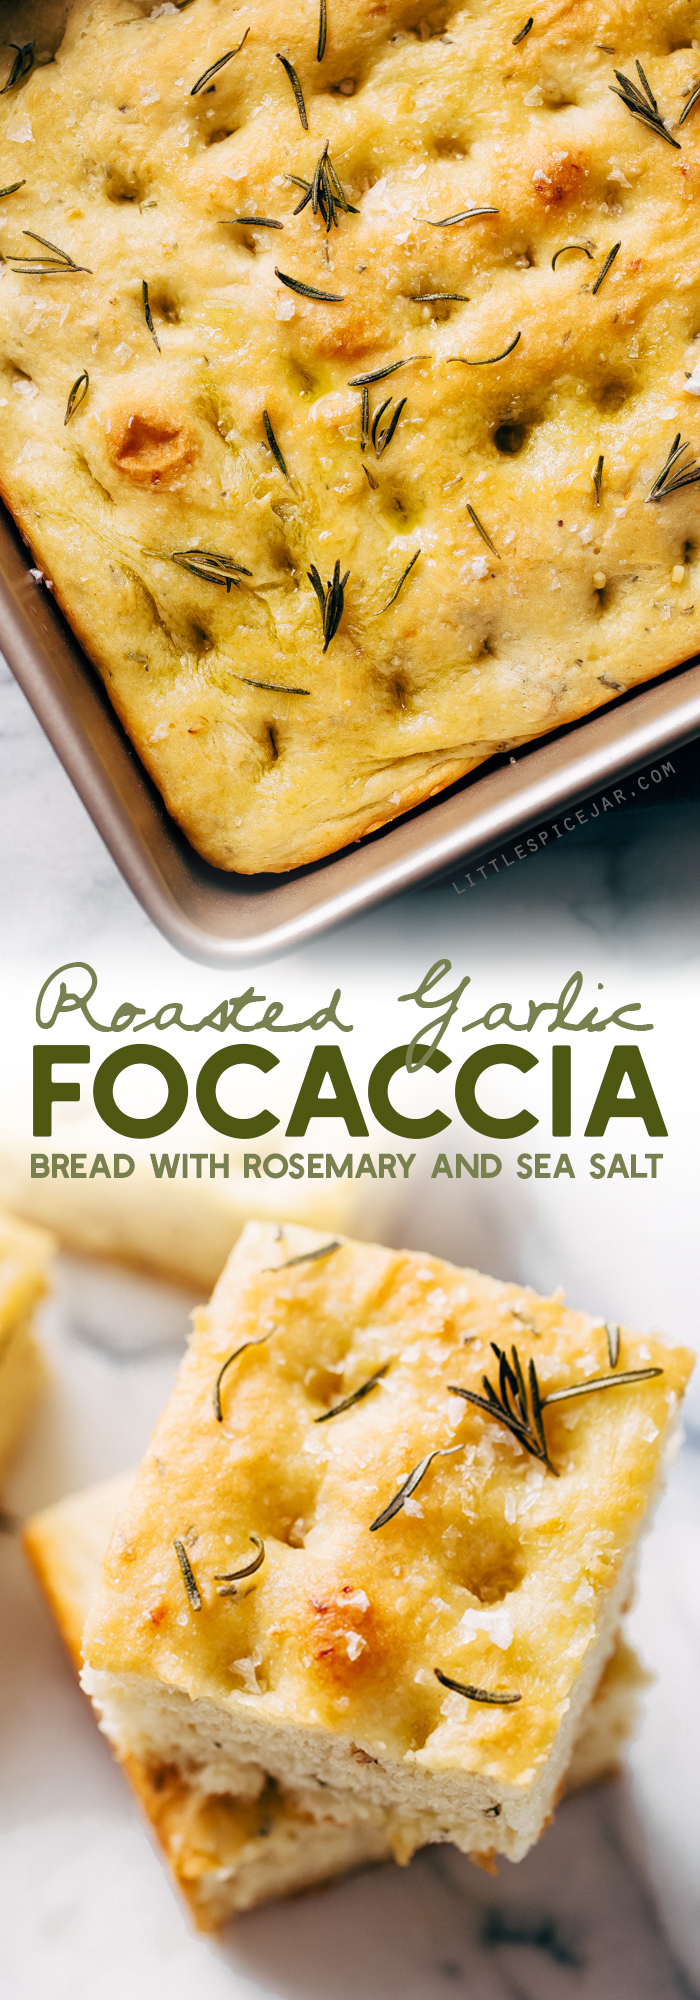
Then when you pull it out of the oven, you can hear just the faintest sizzle of the olive oil as it gently bubbles and kisses the outer crust until it’s golden brown. You use a serrated knife to slice into a hunk and notice how light the bread is. Tender and fluffy on the inside, golden and flaked with sea salt on the outside. As you tear off that first piece, you see the swirls of steam escaping. The edges are crispy, chewy and the inside is buttery and delicate.
Bread is happiness.
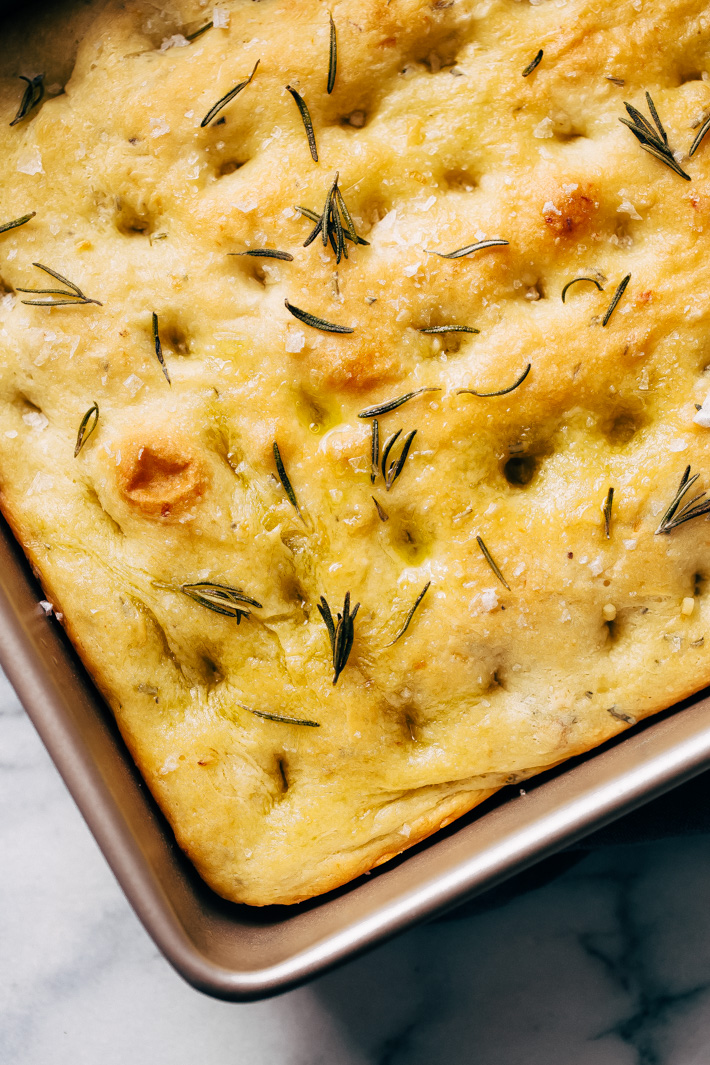
I’ll be the first one to tell you, for a while I found bread making to be tedious and slightly, okay, let’s be honest, SUPER stressful. As I get older, I realize tasks like breadmaking are so calming. There’s something so relaxing about putting a few ingredients together and making something entirely from scratch. Flour, water, yeast, and salt. It’s almost magical when these ingredients get together in a bowl.
I love how the act of bread making allows you just to unplug from the world, roll up your sleeves, and get into the zone. Early morning baking with a little smooth jazz on in the background and a warm mug of coffee is how I’d choose to spend every day if it were up to me.
Homemade focaccia loaded with roasted garlic cloves and topped with flaky sea salt makes me fall in love with food all over again.
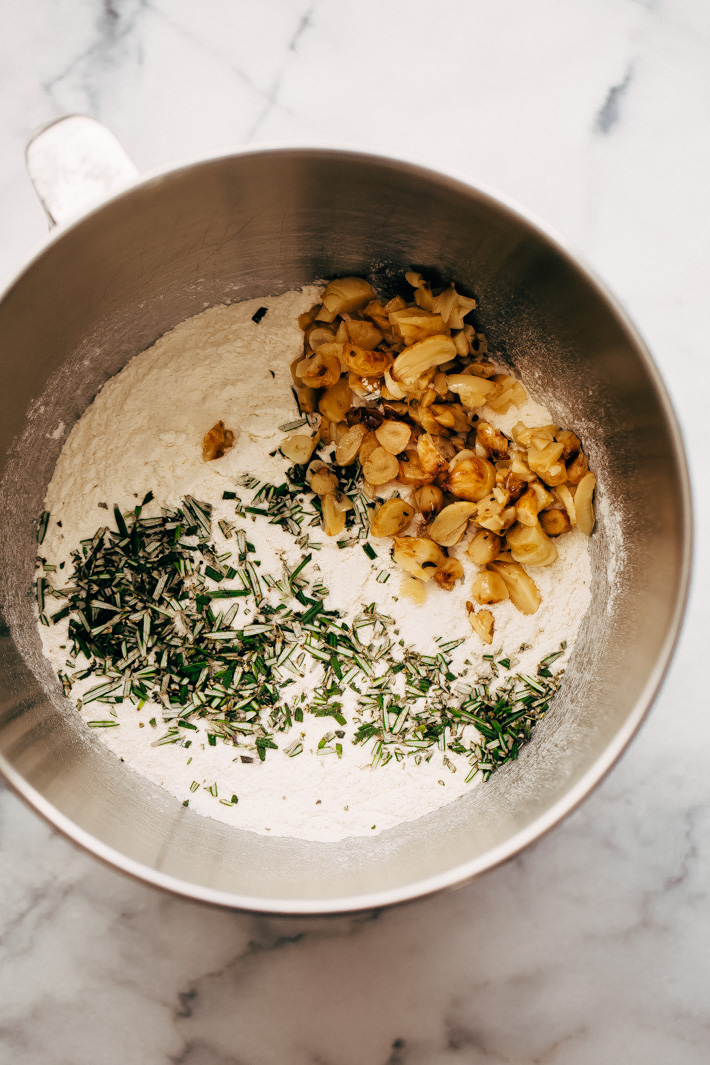
Focaccia bread, you’ve had it before, right?
It’s thick and a little chewy. I hear people comparing it to pizza dough quite a bit, but to be honest, I’ve never had pizza dough that was soft and chewy like this focaccia bread. Typically it’s made with freshly chopped herbs, flour, and quite a few glugs of olive oil. The olive oil is what gives focaccia bread it’s decadent flavor. And though I’ve only ever dreamt of having authentic Italian focaccia, I imagine every nonna teaching her granddaughter to add copious amounts of olive oil until it’s luscious and buttery just like all the nonnas before her made it.
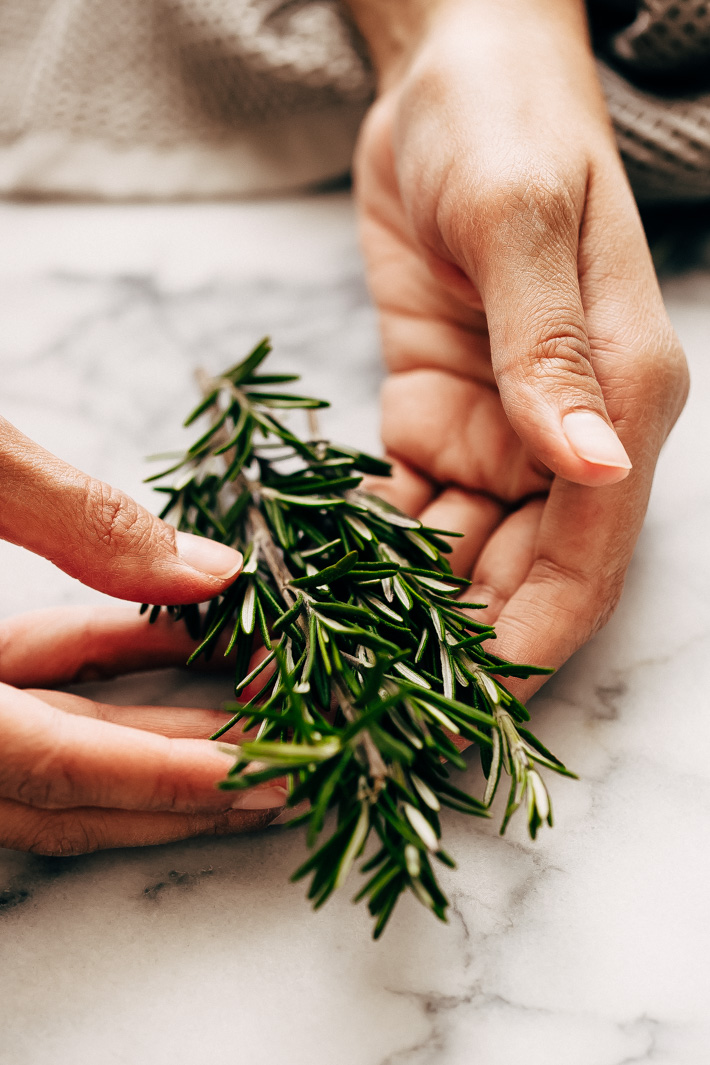
Like traditional focaccia, today’s rosemary focaccia bread recipe has tons of rosemary in it. Usually, I err on the side of caution when it comes to rosemary because personally, I find it can go from adding earthy flavor to tasting like hand soap rather quickly. Maybe that’s just me. But even though we’re using a full tablespoon in today’s bread dough and then topping it with more rosemary, I have yet to make a batch that teetered on the verge of too much.
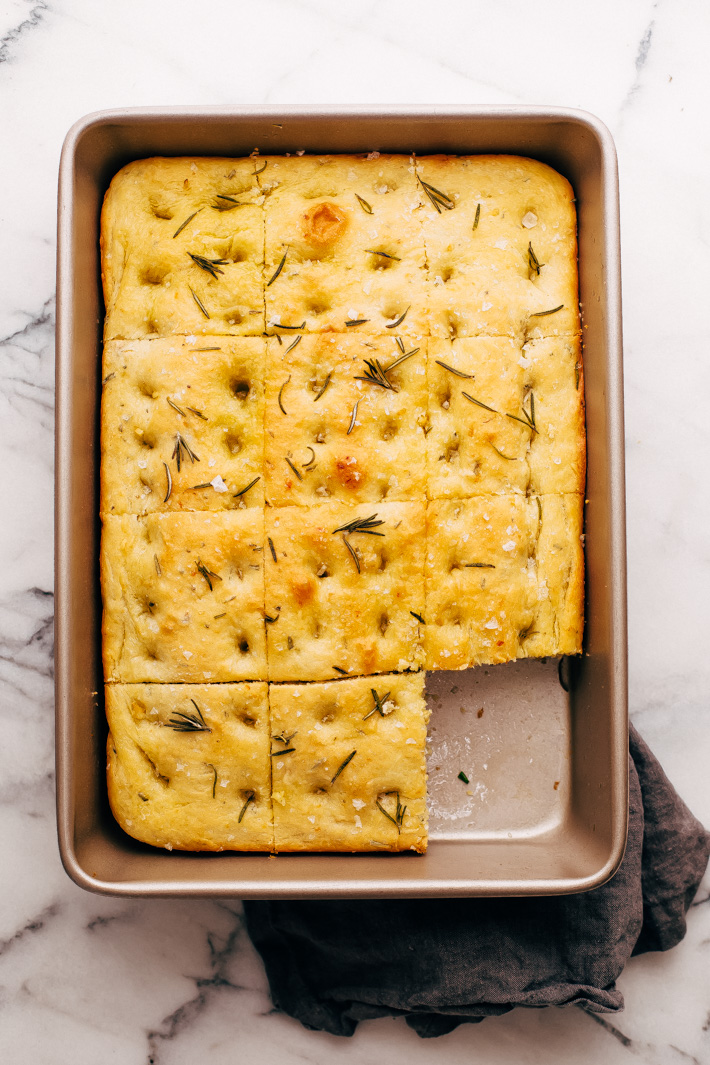
How to make the best roasted garlic focaccia bread:
- I wanted to make this recipe easy to make for everyone while keeping it to a small(ish) batch. We’re using a 9×13 baking pan to bake today’s focaccia as this is a size that’s most commonly found in most kitchens. You might know it as your brownie baking pan. Once you make focaccia bread, you may need to rename it. If you’ve got a glass dish, that will work too. Just be sure to oil it well before using.
- Yeast: This recipe requires fresh yeast. I usually buy a bottle of yeast from the store and keep it refrigerated. If you’re doing the same, you’ll need 2 1/4 teaspoons in total. If you’ve got the kind in a packet, you’ll need one pack. Make sure you use water that is lukewarm (or more specifically, 105-110ºF). You can test this using a thermometer or just by sticking a finger in the water and checking to make sure it’s warm to the touch.
- Extra Virgin Olive Oil: we’re using a generous 1/2 cup, and I know that does sound like a lot of oil but trust me, this recipe needs it. And not only that, you’ll also brush a little more on when the bread comes out of the oven and you what? This is a sometimes recipe, so sometimes, it’s okay to have olive oil soaked focaccia bread. The olive oil is divided into 2 parts, 1/4 cup goes into the bread itself, the rest is split (2 tablespoons each) go to greasing the pan. The last two for brushing on top before the bread goes in the oven.
- Roasted garlic: you guys already know we’re huge fans. I usually roast my own garlic accept when I’m in a huge hurry. So if you’d like, you can roast your own garlic at 375ºF for 1 hour. You would just chop off the tip of the garlic and peel off as much of the paper as possible. Then, drizzle with a couple of teaspoons of olive oil and sprinkle with salt and pepper. Wrap it up in foil and pop it in the oven and sit back as it makes your whole house smell like Thanksgiving. Roasted garlic is also sold in the deli section of most grocery stores (by the pound). You don’t need a whole lot, so that may be an option for you as well. If you’re not a fan of garlic, roughly chopped olives (green or kalamata) would be a great addition here. If you’re purists, just leave it out altogether.
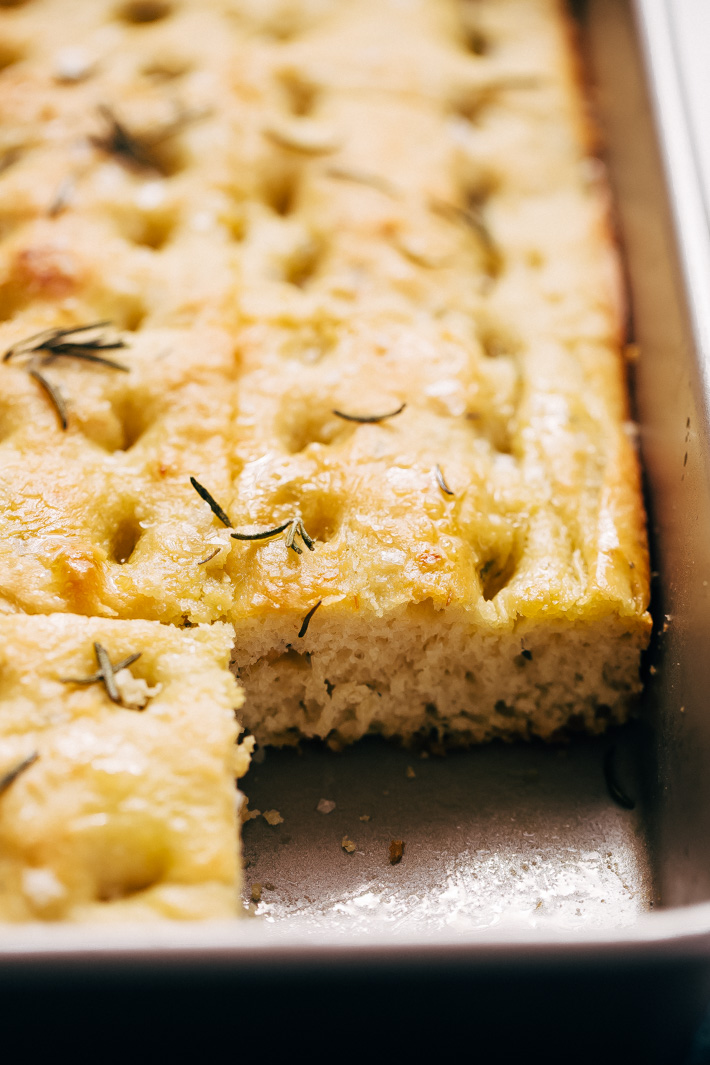
Good rosemary focaccia bread is everything. The perfect companion to a bowl of soup, the Robin to your Batman when you need to mop clean homemade ragu, and the perfect base when you’re building a hearty eggplant parmigiana sandwich.
Seriously, everyone I shared this focaccia bread with, starting with Anees, family, and friends, has LOVED it.
Bread has a way of bringing people together at the table, so I urge you to share this little number with all those you love!
xx
Roasted Garlic Rosemary Focaccia Bread
Roasted garlic scented rosemary focaccia bread is perfect for pasta night or when you've got guests coming! If you're looking for something new to make during the holidays, let this rosemary focaccia bread be it. Follow the step-by-step recipe and see how easy it is to make!

Ingredients
- 1 1/3 cup warm water (105-110ºF to be exact)
- 2 teaspoons sugar
- 1 (0.25 ounce) packet instant yeast (2 1/4 teaspoons)
- 3 3/4 cup flour, plus more (see notes)
- 2 teaspoons kosher salt
- 1/2 cup olive oil, plus more for greasing
- 1 tablespoon chopped rosemary (plus more)
- 1/4 cup roasted garlic, roughly chopped
- flaked sea salt (for topping)
Instructions
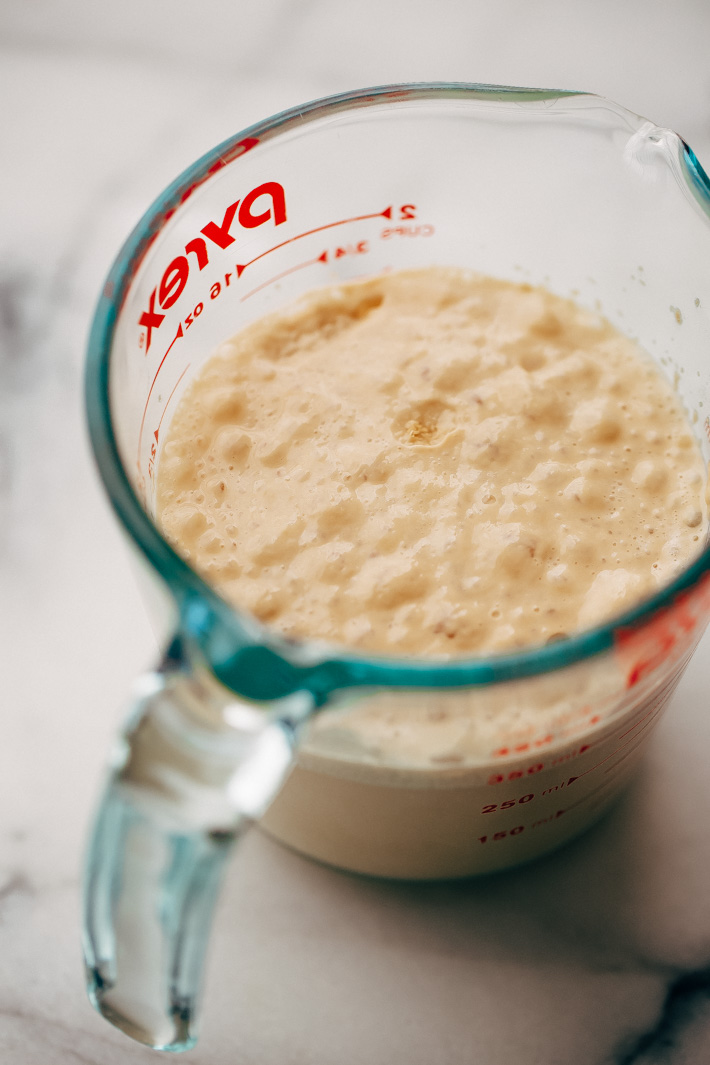
- Add the warm water, sugar, and yeast to a 2-cup measuring cup (affiliate link). Give it a stir and allow the yeast to bloom for 15 minutes. You'll see the yeast is foamy and bubbly near the end of the 15 minutes.
- Meanwhile, add the flour, salt, 1/4 cup of olive oil, chopped rosemary, and roasted garlic to the bowl of a stand mixer. Using the dough hook attachment, turn the mixer on briefly to allow the ingredients to mix together. Pour the yeast mixture into the flour mixture with the mixer running on low. Increase the speed to medium and let the mixer run for 4-5 minutes. Stop and scrape the dough if all the flour doesn't incorporate fully. After 5 minutes, if the dough seems too sticky, use an additional 1-2 tablespoon of flour and form it into a ball using your hands.
- Transfer the dough into a large bowl that has been greased. Rub a dime size of olive oil on the surface of the dough and cover with a piece of plastic wrap. Allow it to rest in a warm place for 1-1 1/2 hours or until it's nearly doubled in size. I usually do this in my dryer (see notes!)
- Position a rack in the center of the oven and preheat the oven to 400ºF. Using half of the remaining olive oil (2 tbsp), grease the bottom of a 9x13 dish (affiliate link). Remove the plastic wrap, and dump the dough into the prepared dish. Gently, using your fingers, push the dough out so that it fits the pan. Cover the dough with the plastic wrap and let sit for 20 minutes.
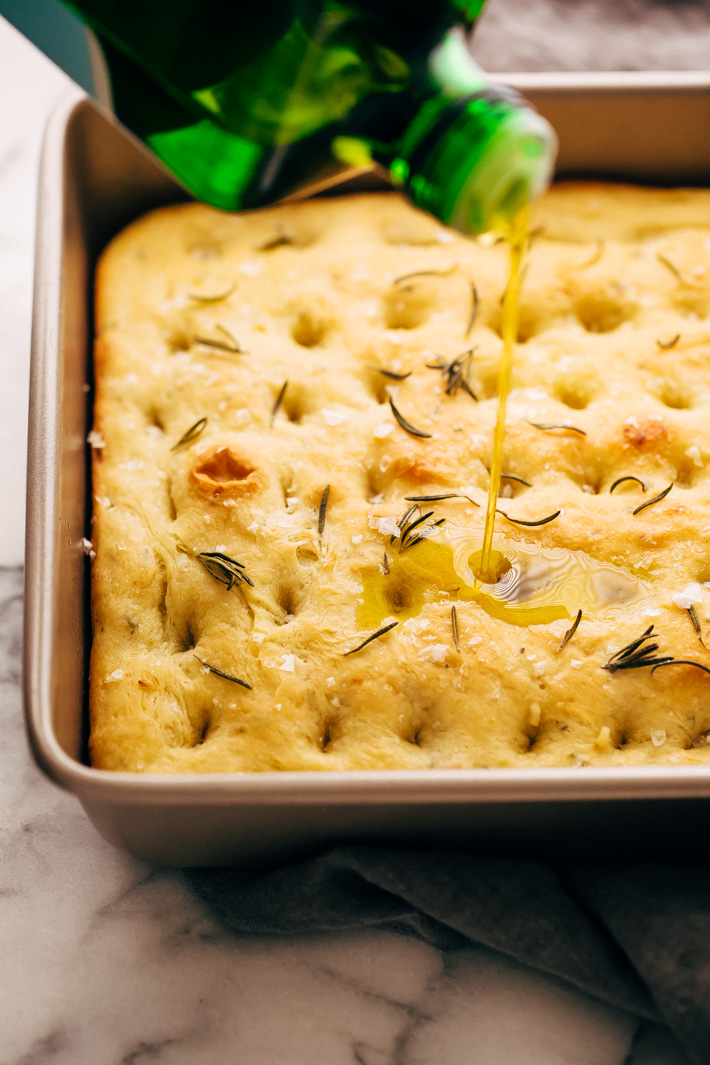
- Brush the remaining 2 tablespoons of olive oil onto the dough. Using your fingers poke holes in the surface of the dough (seriously, poke all the way to the pan!) Sprinkle with additional rosemary, if desired and flaked sea salt (affiliate link). Bake the bread for 20-25 minutes or until golden brown on top and cooked all the way through. Remove from the oven, drizzle or brush with a little bit more olive oil and let cool for a few minutes before slicing and serving!
Notes
- You can use all AP flour for this recipe or what I find yields slightly better results is using 1 1/4 cup bread flour with 2 1/2 cups of all-purpose flour. I suggest using the 'spoon and level' method when measuring out the flour. Here's a video that shows you how to do that!
- A dryer is a great place for your bread dough to proof. Heat the dryer on high for 4-5 minutes, turn off the dryer. And place your bowl inside, and do not open the dryer for 1 hour.
- If you have a hand mixer with dough hook attachment, that will work just fine for this recipe. You can also use a bread dough machine to combine the dough or even just knead the dough with your own hands (about 12-14 minutes).


WOW! I make focaccia every week, but this has really inspired me to throw some roasted garlic in there, yum! Thanks for the recipe 🙂
Roasted garlic adds soo much flavor to the mix, hope you love it!
Hi Marzia, excited to make this, but are the measurements off in your bread flour version? There seems to be 1 cup of flour missing vs. the all AP recipe. Dough came out super sticky….help please!
Yes! My sincerest apologies. I’ve edited the recipe. It’s suppose to be the same 3 ¾ cup, and you’re right, 1 cup was missing! Again, so so sorry!
Nothing to be sorry for! It all worked out in the end with a bit of fiddling. Yummy! Thanks again. Just discovered your site. It’s a feast for the eyes as well as the stomach! 🙂
I love this! Can I add the garlic AND olives, or just one or the other? I was thinking some black kalamata olives would be so delicious in this! (And how much do you think? 1/4 C chopped?) I’m so excited to make this and bring it to my parents house today! I’ll defintley be back to update.
Hey Christina! Glad to hear you’ll be giving the focaccia bread a try! You can use both roasted garlic and the olives if you’d like. I suggest using no more than a total of 5 tablespoons though (so maybe 2 of one and 3 of the other). Also, be sure to dry your olives on a piece of paper towel and chop finely so that you get a little in each bite! 🙂
I love this! Definitely going to be a repeat recipe in my house! It’s not too hard to do and tastes delicious!!! It was a big hit for my bread loving Italian family. I also added Kalamata olives chopped up small in the same amount as the garlic and it was great! Super tasty. Thanks for this 🙂
I saw this recipe featured on the FeedFeed and got totally inspired. I am from Germany and started to bake at 1 am since I got so excited to bake my very first own focaccia. What can I say – it worked perfectly. All the measurements are fine, the timing also worked and the flavor was perfect. I even roasted the garlic in the oven while waiting for the dough, which worked perfectly. I can absolutely recommend this recipe!
I’m so happy to hear you enjoyed it, Katharina! Thank you for taking the time to comment 🙂
The dough was REALLY dry. I tried adding more olive oil but that didn’t help. The result was a really dry bread. I read other recipes and they had the same amount of liquid with 1 cup less flour. Are the measurements off? help!
Sorry to hear the focaccia bread didn’t turn out for you, Katie. I haven’t had any other complaints about the bread not turning out so I think it may be a simple issue like a tad bit too much flour in the dough. I use the ‘spoon and level’ method when measuring out the flour. Here’s a video you may find helpful! If you find the dough is still on the drier side, I suggest adding a tablespoon of water (in small increments) instead of olive oil until it reaches the proper consistency. Hope that helps! 🙂
Made the recipe and it turned out perfect! It was quite the process but if you have the patience to do exactly as the recipe states it should be a no brainer. I used a for instead of mixer and turned out fine.
This recipe is fantastic! My husband planted heirloom and cherry tomatoes in his herb garden. So I used fresh rosemary, red and green basil, and cherry tomatoes from the garden and garlic and red onion. Posted a pic on FB and people are raving about it. Thank you for this great recipe!
This was AWESOME!! Brought it to a Christmas party and it was an instant hit!! Thanks so much–will be making this one again, and again and again!!
I LOVED it.. and my family “destroyed” the focacia in few minutes!! Unfortinatly made without garlic, but I will make with them next time!!!
1st time made- Gone in 20 minutes. They all asked for more. Make it weekly now. Made 2 batches, Doubled the roasted garlic as this was served with our Sunday Supper-beef short ribs in marinara sauce for 10 hours-lots of celery, onions, bell peppers. The bread compliments this dish so phenomenally. Their begging for double garlic again, thanks to your recipe. And its so fun to Poke the bread.
Absolutely delicious and a super easy recipe to follow. It was hard not to devour the whole thing right out of the oven all by myself!
How far ahead can it be made?
Do you think that I could use Thyme instead of Rosemary ?? If so how much ?
Thank you, Susie
Yes, you could use thyme as well. I’d use about the same quantity or maybe a little more, 1 – 1 1/2 scantish tablespoon.
First of all—love this so much. We’ve baked this focaccia a number of times and always have such amazing results. Quick question: if I wanted to Divide and make two smaller focaccia, would it change the bake time?
Thank you!
So happy to hear you enjoy this focaccia! I think if you were to split the dough into a two smaller pans, it might take around 18-22 mins. I would start checking around 16 minutes and then adjusting with additional time from there just to be on the safe side. Hope that helps!
Very easy to follow the directions and you wind up with a fabulous focaccia. This recipe takes a long time to make but most of the time is just waiting on your dough to rise, but it is so worth it. Not a challenging recipe which will make this a repeat in our household! I didn’t have time to roast the garlic ahead of time so I added a little garlic powder to the batter and put some raw sliced garlic on top in the final baking phase which resulted in almost garlic croutons on top. Can’t wait to make it with roasted garlic too. Thanks!
My focaccia bread turned out perfectly! My husband was amazed that I made it since it’s the first time I’ve tried to bake bread. I don’t know how I found your website, but I’m loving it! I’m trying to decide what to make next! Thank you very much!!
So glad you found Little Spice Jar, and that you enjoyed the focaccia! 🙂
Can I use instant yeast as opposed to active dry yeast? If so, do I still follow the directions as written?
Hi, Tiffany! You can use instant yeast in place of the active dry yeast in this recipe. You would still follow the directions, however, the resting time for your dough during the rise will be slightly less. For the first rise, yours will probably only take 1 hour (or maybe a few minutes over that) to double in size. Hope you enjoy the focaccia!
Do I follow the instructions on the yeast packet first then the recipe?
Absolutely love this recipe. Easy to make and delicious.
Happy to hear you enjoyed the focaccia! Thank you so much for taking the time to come back and comment 🙂
I forgot to roast the garlic and added it raw…will see how it turns out ?
Loved it! My first time making focaccia and it was a hit! I loved and followed all of your extra tips! I will never again proof dough anywhere other than my clothes dryer! Great recipe! Thanks!
Oh, glad you used the dryer trick! It’s a life changer! Thanks for taking the time to come back and comment ?
This was my first time making focaccia and it came out better than I even could have imagined! The dough was unbelievably sticky (even after adding 3 tablespoons extra of flour) and had me a little worried, but I just let it proof and do its thing and it was magical. Thanks for the hot tip on the mix of bread and AP flour – the most tender crumb while also being crispy and slightly chewy. Dream bread!
I’m glad you did a split of bread and AP, we love it that way 🙂
Amazing recipe. Brilliant tip to proof dough in dryer. It always takes so long to rise otherwise. This worked perfectly! Thank you.
So glad you tried the dryer trick! ?
Omg!!! This is a delicious recipe!!!!!! Only question I have…if I hide it so no one devours… how should I store it so I can have for tomorrow?
So glad to hear it was enjoyed! You can place leftovers in an airtight container (or wrapped very well in foil) and leave it at room temperature. If you hide it, just don’t forget where you placed it 😉 To reheat, just place in a 350ºF preheated oven for roughly 7-10 minutes or until warmed through. If it’s more than a day when reheating, I suggest spritzing both sides of the focaccia with a bit of water before reheating.
Do you have to punch down the dough after the first rise?
No need to punch it down, you can simply dump it in the baking dish and stretch it out with your fingers. The air will work it’s way out as you stretch it!
I have never made bread before and tried this receipt for the first time. It came out so good. My family couldn’t stop talking about Love the roasted garlic. Thank you for the recipe
So happy to hear that, Amisha! Appreciate you taking the time to comment 🙂
Delicious.
Made this LOVE,LOVE this recipe. Huge crowd pleaser!!! Love the tip about using the dryer!!!
Oh yay! Glad you liked the dryer trick!
Fantastic…everyone loved this focaccia. No more store bought for me, so simple to make.
That makes me so happy! Thank you for taking the time to come back and comment, Annie!
I’ve made this several times in the last few weeks and it has quickly become a family favorite! Last week I made it in a sheet pan as our pizza dough and it was amazing!
What a great idea! So happy to hear you’ve enjoyed the focaccia recipe, Pam!
Delicious! A new family favorite, and so easy too!
That makes me so happy! Thank you for taking the time to come back and comment 🙂