This post may contain affiliate links. Please read our disclosure policy.
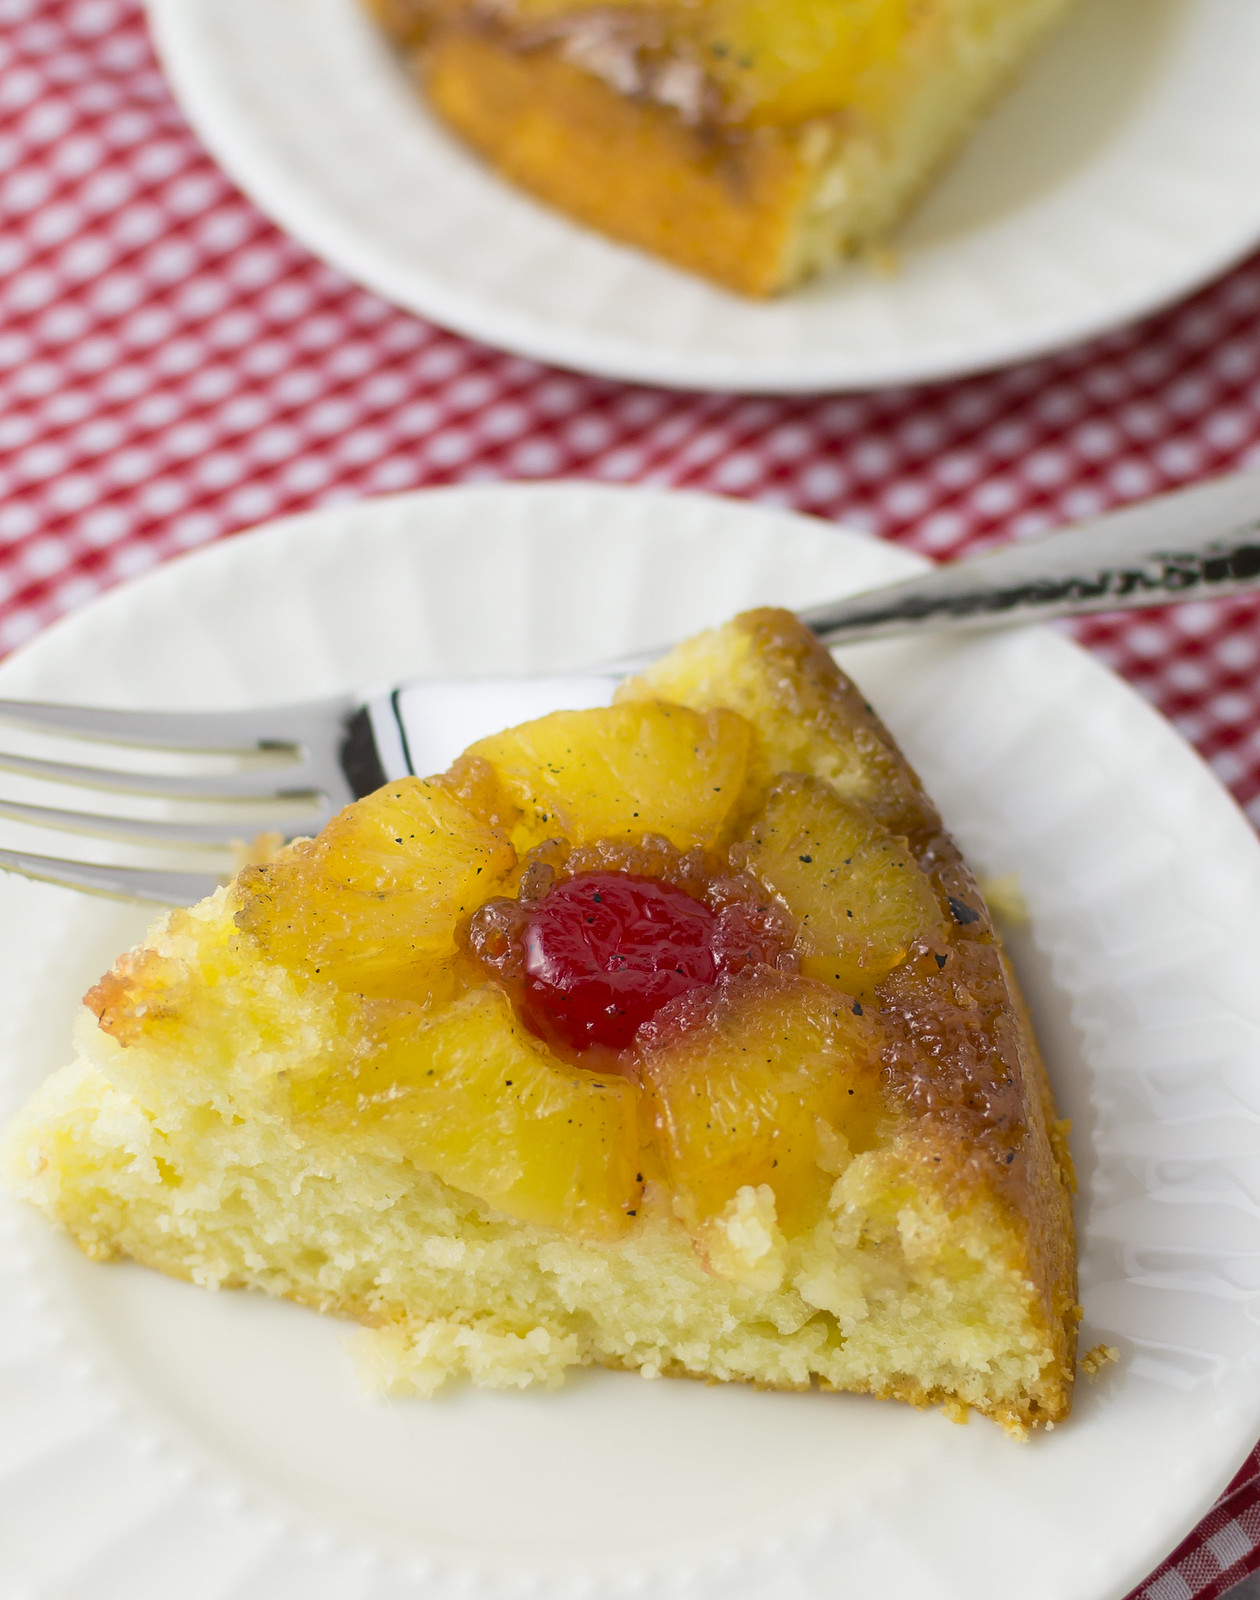
Hi my name is Marzia and I’m addicted to the gooey caramel of a pineapple upside down cake.
There I said it!
This morning I melted butter and brown sugar in a cast iron skillet and pretended like I had full control of my life. Unfortunately, sometimes that’s not entirely true. Especially around pineapple upside down cake.
I hereby surrender myself to melted butter and brown sugar, caramel-y deliciousness. As I’m typing this, my sidebar is showing a 100 calorie yogurt ad. Totally false advertising, people. I’m admitting it. We are licking the cake plate clean today.
This cake is so so SO good. The hardest part was not eating three slices. Which is exactly why I did eat three slices. But in all fairness i’ve had three salads this week. Those cancel out the three slices.
Good math. Don’t you love it? Now if only that would translate into the loss of one dress size.
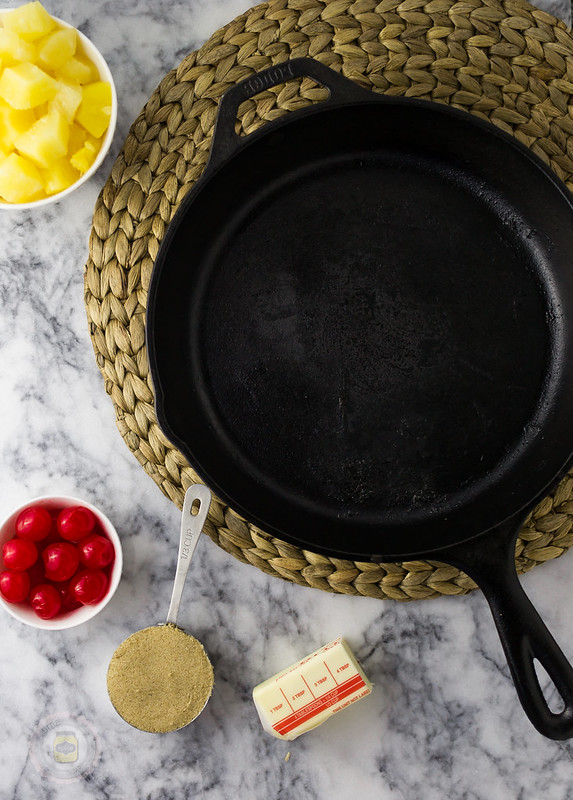 I’m making mine in a cast iron skillet. But you can definitely cook the caramel in a sauce pan and then transfer it to a round baking pan.
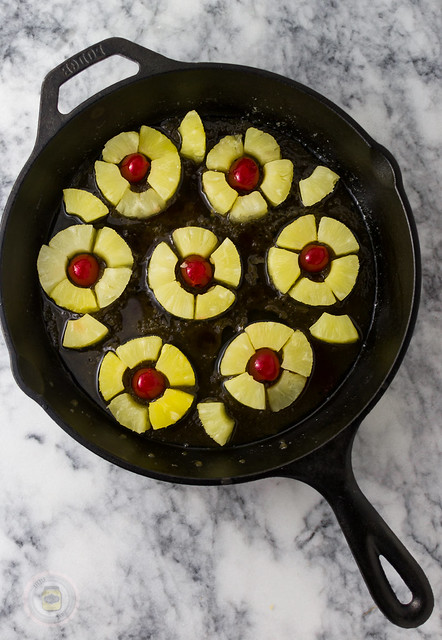 I’m using pineapple chunks. You can use slices if you like. It is totallly up to you. The beauty of this all is that regardless of the pan or the cut of pineapple, the cake is extremely soft and airy.
YUMMA. NOM. NOM.


Cross your fingers and pray for a good flip. And of course I did get a good flip. Only I was totallllly mesmerized by the bubbly brown caramel and forgot to take a picture! {insert Face Palm here} What? I alreadyyy admitted I have a prob-lem.
 Recipe slightly adapted from The Gourmet Cookbook
Pineapple Upside Down Cake
Ingredients
For the Pineapple Layer:
- 1/2 stick 4 tablespoons unsalted butter
- 1/2 cup packed light brown sugar
- 7 slices of pineapples I used chunks in a 20oz can
- 7 maraschino cherries pits removed
For the Cake Layer:
- 1 and 1/2 cups cake flour
- 2 teaspoons baking powder
- 1/2 teaspoon salt
- 1/2 cup buttermilk or half a cup of milk + 2 teaspoons vinegar and let sit 5 min
- 2 teaspoons vanilla extract
- 2 tablespoons pineapple syrup the stuff that canned pineapples come in
- 3/4 stick 6 tablespoons unsalted butter, softened to room temperature
- 3/4 cup granulated sugar
- 2 large egg yolks room temperature
Instructions
- To make the Pineapple layer:Melt the butter in a cast iron skillet or a medium saucepan over medium heat. Add brown sugar and cook, whisking to remove all clumps. About 1 minute. If using cast iron skillet place pineapple slices and maraschino cherries to desired arrangement. If using a baking pan, transfer the caramel syrup to baking pan and decorate with pineapple slices and maraschino cherries as preferred.
- To make the Cake Layer:Place a rack in the center of the oven and preheat the oven to 350 degrees F. Sift together the dry ingredients: cake flour, baking powder, and salt. In a small bowl, whisk together the buttermilk, vanilla extract, and pineapple syrup. Set aside.
- Beat the butter and sugar on medium speed in an electric mixer fitted with a paddle attachment or with a hand mixer until light and fluffy, about 3 minutes. Add yolks one at a time and allow them to be incorporated completely. Reduce speed to low and add flour mixture and buttermilk mixture alternately in 3 batches, beginning and ending with flour mixture and mixing until just combined.
- Pour the batter into the cast iron skillet or baking pan and bake until puffed and pale golden, about 25 – 30 minutes or until a toothpick inserted in the center comes out clean or with just a few crumbs. Mine took 27 minutes. Cool cake completely before loosening the sides and flipping onto a plate. Serve warm or at room temperature.
Like This? Leave a comment & rating below!