This post may contain affiliate links. Please read our disclosure policy.
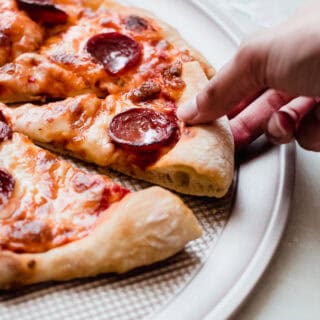
Learn how to make no knead pizza dough! This recipe uses only four ingredients! My homemade pizza dough requires no kneading yet it makes the best wood-fire style pizza – in your regular oven!

No knead pizza dough is simple; it requires patience in place of effort. And if I’m promised a pie at the end that tastes just like it came out of a wood-fire pizzeria without putting in much effort – I AM ALL FOR IT.
We’re talking about a pizza dough that requires just four simple ingredients. You can use less yeast if you plan on making the dough a day or two ahead of time, or you can use more yeast and make pizza on the same day!
It’s a simple recipe that produces excellent results, and I can’t wait for you to try it!
What is no knead pizza dough?
No knead pizza dough is a high hydration dough that can be made without having to knead the dough by hand or in a stand mixer. Generally, no knead dough has a slower fermentation than other pizza doughs. The gradual fermentation process helps develop more flavor as the dough sits.
Ingredients for no knead pizza dough recipe
- Flour: For this recipe, you can use either all-purpose or bread flour. The higher percentage of water in this recipe allows for both of these types of flours to work. I find I like the recipe a bit better with all-purpose flour. If you prefer an ultra-crispy, crunchy crust, you might want to try bread flour here.
- Salt: the primary function of salt is the help flavor the pizza dough. But the salt also plays another role. It also determines the swelling capacity of the gluten. Adding too little salt would cause the dough to rise too rapidly.
- Yeast:I prefer to use instant yeast to this recipe because the beauty of instant yeast is that it cuts down on one extra step – blooming the yeast.
- Water: this recipe uses warm water. Using water between 95-105ºF helps kick start the yeast.
What if I only have active dry yeast?
Active dry yeast will also work for this recipe. However, you will need to add it to the warm water, stir and allow for it to bloom for 7-10 minutes or until it starts fizzing and foaming at the top. This means the yeast is activated. Then, you can use it in the recipe. Keep in mind that it will take double the time listed for the dough to rise as it would for instant yeast.

Why is high hydration dough important when it comes to no knead pizza dough?
A high hydration pizza dough is a dough that contains 57% (or more) liquid in relation to the total flour weight. It is basically a calculation of how much water the dough contains. So for example, if you use 100 grams of flour to make a dough that is 57% hydration, you would use 57 grams of water. Dough hydration is the level of water/liquids in the dough.
It is important to know the amount of hydration in your dough for a few different reasons:
- It affects how long your dough will take to rise
- How quickly the dough expands in the oven
- The flavor, texture, and appearance of the finished product
The lower the hydration of the dough:
- the stiffer and more tough the dough will be, so you have to work harder to shape the dough
- gluten development and fermentation will take longer
The higher the hydration of the dough:
- The stickier the dough will be
- Ingredients will mix more evenly
- Kneading becomes less important! The additional liquid in the dough allows the yeast to move around easily which makes it easier for the gluten to develop (which gives you a better overall texture to the crust)
- More flavor development in the end product

This recipe is inspired by Jim Lahey’s ever-popular no-knead dough. It uses a 70% hydration dough. My recipe is at 80% hydration. I find that the dough is more forgiving if you add a bit of extra flour during shaping. But it also allows you to use bread flour if you prefer a snap to your crust.
How to make no knead pizza dough
- Make the dough: Combine the flour, yeast, and salt in a medium bowl with a whisk. Add the water and mix the dough using a dough whisk or a wooden spoon. Cover the bowl with plastic wrap and allow it to sit at room temperature till the next day if you’re doing the slow method or 1¼ – 1½ hours if you have less time and want this out faster. Cover with a kitchen towel.
- Divide the dough: pour the dough out onto a well-floured work surface and using bench scraper dipped in flour, divide the dough mounds out into four neat circular mound. Keeping the seam side down, place on a baking sheet. Cover loosely with a towel.
- Preheat the oven in advance: at least 40-45 minutes before you want to bake your pizza, preheat your oven! If you are using a pizza stone, now would be the time to place it in the oven and allow it to heat through as the oven preheats.
- Shape it: Working with one dough ball at a time, generously dust your work surface. Shape the dough using your fingertips on the counter in a circular motion or with your knuckles in the air until you roughly have an 11-12” disk.
- Bake your pizza: Top the pizza crust with tomato sauce, and desired toppings, lots of shredded mozzarella, and place the pizza on a baking tray. If you’re baking on baking steel/stone, I suggest topping the dough on your pizza peel once you have dusted it with semolina flour/cornmeal. Make sure to give the pizza peel a gentle shimmy. Use the peel to transfer the pizza onto the baking steel/pizza stone. Bake for 7-9 minutes or until the pizza browns and blisters. Top the pizza with fresh basil leaves, fine sea salt, parmesan, a drizzle of extra-virgin olive oil when it’s hot out of the oven!
Recipe Tips
- Be gentle with the dough. The more bubbles that you can preserve from the fermentation process, the better the overall texture will be.
- If you find the dough is resisting the stretch, give it a few minutes to rest. Cover with a kitchen towel and let it hang out for 10-15 minutes to relax. The gluten in the dough is overworked, and needs time for it to relax before shaping.
- Don’t pop the bubbles! If you see your pizza dough bubbling up, don’t pop those bubbles! That ballooned up dough with crisp up in the oven and gives it that wood-fired pizza dough look!
- Alway make your pizza dough slightly larger than you want it to be at the end, it will shrink back a bit.
- Don’t over sauce or add too many toppings! Using just a few simple toppings makes the best pizza experience! Using too many toppings/pizza sauce could hinder the dough from rising in the oven.
- Once you’ve placed the pizza on the peel and topped it, give the peel a shimmy to see if the pizza moves. If it sticks anywhere, lift and sprinkle with semolina flour/cornmeal.
- Move the pizza towards the end of the peel before you get to the oven, and gently slide the peel back and forth in your hand to lower the pizza onto stone.
If you like this recipe you might also want to try:
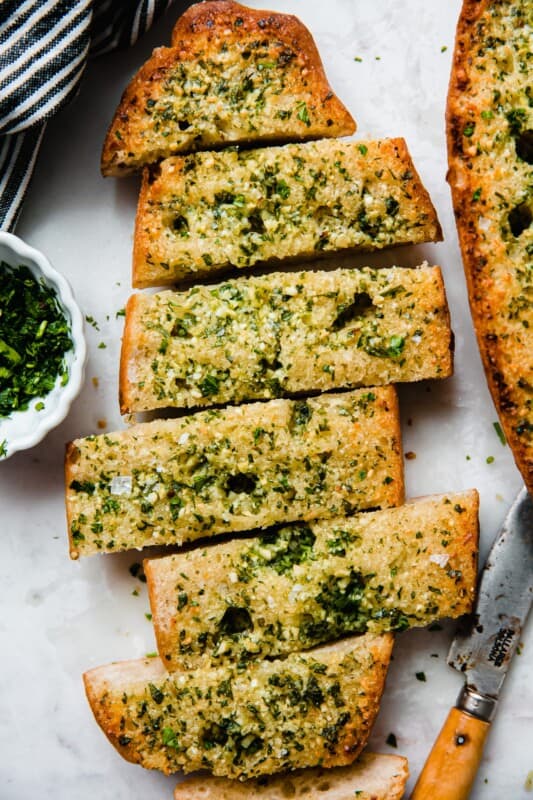
- homemade pizza sauce
- detroit-style pizza
- philly cheese steak pizza
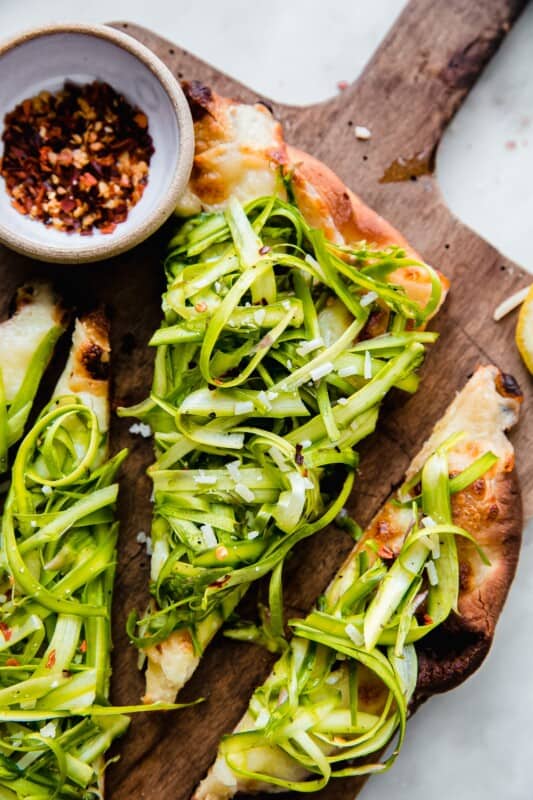
- caramelized onion feta spinach pizza
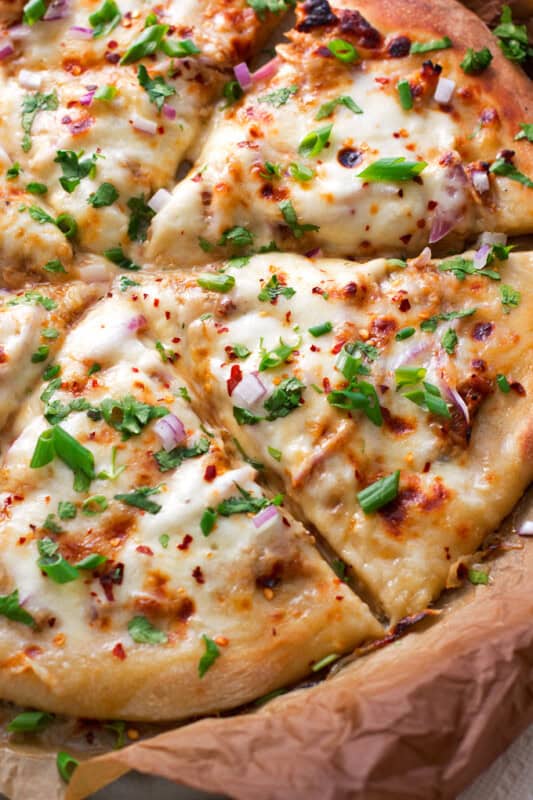
- bbq chicken pizza

Lazy No Knead Pizza Dough
Ingredients
- 3 ¾ cup bread flour or all-purpose flour (~500 grams) plus more for dusting
- ¼ – 1 teaspoon instant dry yeast see notes
- 1 ½ teaspoons kosher salt
- 1 ¾ cup 400 grams warm water (between 105ºF)
Instructions
- SLOW METHOD: Combine the flour, ¼ teaspoon of instant dry yeast, salt, and water with a dough spatula until mixed. Cover the bowl with plastic wrap and allow for it to sit at room temperature for 8-9 hours (might be a bit longer if you live somewhere where it’s cold.)
- FAST METHOD: Combine the flour, 1 teaspoon of instant dry yeast, salt, and water with a dough spatula until mixed. Cover the bowl with plastic wrap or a damp tea towel and set aside in a warm spot (preferably 72-85ºF) for 1 ¼ – 1 ½ hours or until the dough visually doubles in size.
- SHAPE: Position a rack near the upper third of the oven. If you are using a pizza stone/baking steel, go ahead and place it in the oven before you start the preheat process. Preheat the oven to 500-550ºF (whichever is the highest your oven will go, keep in mind preheating takes at least 40-45 mins) Place the dough on a well floured surface and divide the dough out into 4 equal portions. Working with one dough ball at at time, generously dust your work surface with at least ¼ cup of flour, the dough is super wet so it can handle the flour! If you happen to need more, feel free to use a little more! Shape the dough using your finger tips on the work surface or with your knuckles in the air until you make an 11-12 inch disk.
- BAKE: If you’re baking on a stone, dust the pizza peel with semolina flour or cornmeal and place the pizza on it. If you are baking it on a pizza pan, dust the pizza pan before placing the pizza dough on top. Drizzle sauce, top with toppings and cheese. Give the pizza peel a shimmy to make sure the pizza is moving around easily. If it’s not, lift the corner that is stuck and sprinkle a bit more semolina flour. Transfer pizza from peel to baking steel. I like to shimmy the pizza to the edge of the peel, so it gently slides off as you pull the peel back. Bake for 7-10 minutes or until it browns and blisters to your liking. Transfer pizza to a heatproof work surface, slice and serve!
Notes
- MAKE AHEAD: if you plan on making this ahead of time, I suggest using the slow method as there’s no real reason to waste additional yeast. When the dough is double the size, gently divide the dough ball into 4 large portions. Place the dough balls into separate containers and refrigerate for up to 5 days. You could also freeze the dough in large zip-top bags for up to 3 months.
- If you’re using refrigerated dough to make pizzas, be sure to remove the pizza dough from the fridge about 1 – 1 ½ hours before shaping/baking.
Nutrition
Nutrition information is automatically calculated, so should only be used as an approximation.
Like This? Leave a comment & rating below!


I have made it 3 times. It is very easy and tastes great. I let it rise in the fridge for a few days before freezing or using. I shape it by putting it on parchment paper and dipping my fingers in olive oil. It is so much easier and cleaner than using flour and a rolling pin.
This is a GREAT! Thank you for the additional tips.
Looks great!
Thank you, Anu!