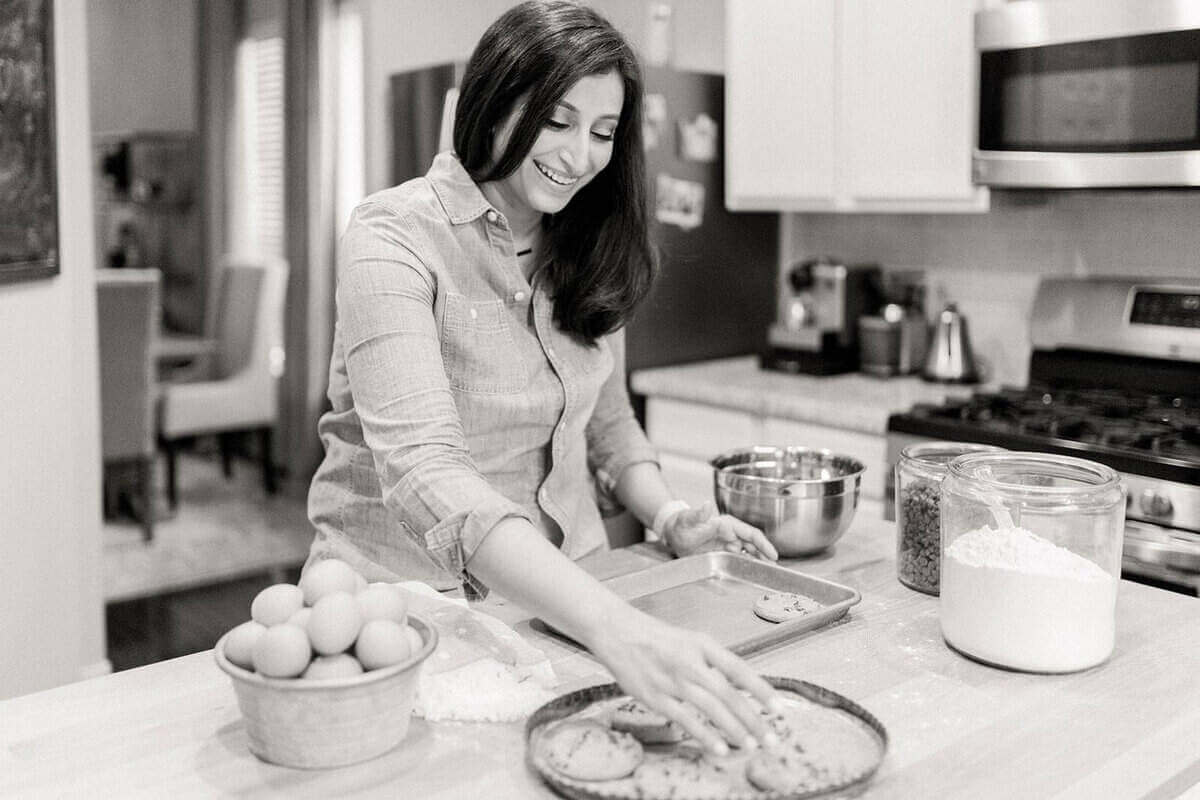
This post may contain affiliate links. Please read our disclosure policy.
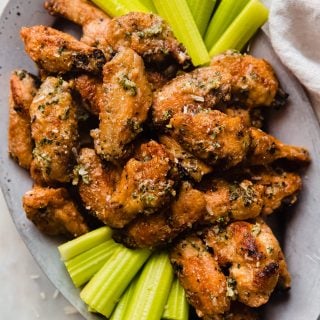
Golden delicious garlic parmesan wings made in the oven or the air fryer! These are better than your favorite restaurant wings! One little ingredient makes them extra crunchy like they came out of the fryer!

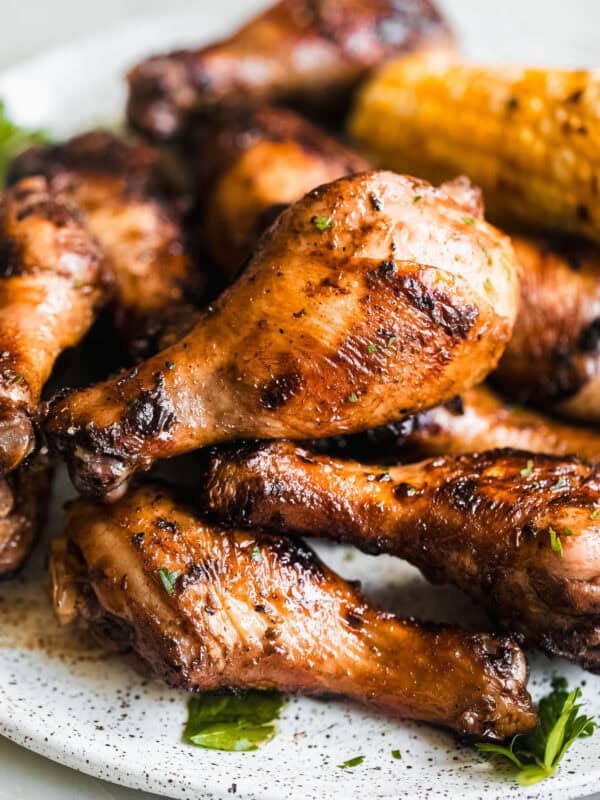
Garlic Parmesan Wings!
For someone who refuses to eat bone-in chicken, wings are about the only exception to the rule. And how can it not be when they’re golden, crispy, hot, and loaded with garlic parmesan flavor straight out of the oven instead of the deep fryer.
Speaking of chicken wings! Am I the only one that despises breaded chicken wings? And I’m not big of fry wings either. Don’t get me wrong; this girl loves a good crispy chicken tender. But when it comes to wings, I’m and oven-baked wings girlie. I want them tossed in sauce, and no breading should get in the way of that crunchy golden skin!
These are big on flavor and perfect for football watching! Because some of us, I won’t name names are only at game day for the appetizers!
Wow! You promised these would be better than my favorite restaurant wings and you delivered on your promise. They were fantastic! Next time I will cut back on the sauce; we loved the wings so much without it, that a little drizzle would be fine for us.
Thank you for this recipe. 🙂
Ingredients for Garlic Parmesan Wings Recipe
- Chicken wings: Sometimes you end up with chicken wings that haven’t been cut for you. I like to remove the wing tips first and save them for a pot of homemade chicken stock. I then take the leftover ‘v’ and slice it down the center joint to create the drumstick and the wing.
- Baking powder: You’ll want to use aluminum-free baking powder for this recipe. The baking powder is the special ingredient that will help give these wings that super crispy texture. More on this below.
- Seasonings: You’ll need kosher salt, garlic powder, black pepper, and some paprika. The paprika isn’t really going to add to the flavor, but rather is used to give the wings a bit more color!
- Parsley: I love adding a bit of fresh parsley to my garlic butter because it brighten both the flavor and the color!
- Fresh Garlic cloves: We’ll grate the garlic and create garlic butter to toss the wings in.
- Butter: melted butter, garlic, and parsley and zapped together in the microwave and we’ll toss the wings in this right when they’re hot out of the oven.
- Parmesan: grated parmesan cheese works best for this recipe, we’ll sprinkle this on top of the wings right before serving.


How to make Extra Crispy Wings
- Prep first. Start by preheating the oven and lining a large rimmed baking sheet with foil. You’ll also want to set a wire rack on top of the baking sheet, and spry the wire rack with cooking spray to keep the wings from sticking.
- Season the wings and bake. You’ll want to thoroughly pat the wings dry before seasoning them. Combine the baking powder, salt, garlic powder, black pepper, and paprika in a small bowl. Sprinkle this seasoning mixture evenly over both the skin side and the flesh side of the wings. At this point, if time permits, line the wings on the baking sheet and place in the fridge for at least 45 minutes and up to 24 hours in advance. If you don’t have the time to refrigerate, you can let the wings sit for 10-15 minutes at room temperature or bake them immediately.
- Make garlic butter topping. When the wings are almost done, add the butter, minced garlic, salt, and parsley to a bowl. Melt the butter mixture in the microwave for 30-60 seconds. Place the wings in a bowl, pour the garlic butter sauce over the wings and toss to coat them evenly. Then, sprinkle with the parmesan and continue to toss until all the wings are evenly coated. Plate and serve immediately with celery, carrots, and ranch dressing if desired.

Here’s why this recipe is always a success!
- I pat the wings dry. Once you’ve trimmed the wings, take the time to dry them really well. I like to layer a few sheets of paper towels on a cutting board, line all the wings up, and place a few more paper towels on top and blot.
- Don’t skip baking powder. Baking powder helps give these wings that crisp and golden brown hue.
- Spread out the wings and use a wire rack. Using a rack ensures that the wings will have air circulating all around. This will help brown them rather than steam them in the oven. When in doubt if they’ll fit, bake on two baking sheets, baking one sheet pan at a time for optimum golden and crispiness!
- Let them dry out, if time permits. If you are planning in advance, season the chicken with all the seasonings, then place them on the wire rack and pop the rack into the bottom shelf of your refrigerator. Doing this overnight yields better results, but even 45 minutes helps!
- Toss the wings in a large bowl. When the wings are done, pop them into a large metal bowl and then drizzle in the garlic butter. Instead of using tongs to toss, swirl and toss the wings in the bowl. This keeps all the sauce from sticking to the tongs!

Recipe FAQs
Baking powder is alkaline, which means that it raises the pH of the wings’ skin, causing the Maillard reaction to occur between the reduced sugars and amino acids. So when we bake the wings, you get wings that are perfectly golden brown, crispy, and full of flavor!
The general rule of thumb is about 8 ounces of chicken wings per person if this is a meal or if you aren’t serving too many other apps with it. This recipe would make enough wings for 5-6 people.
Yes, absolutely! I suggest preheating the air fryer to 400ºF. When it’s hot, add a single layer of wings to the air fryer basket. Make sure not to overcrowd the basket as they won’t get crispy that way. Bake for 16-22 minutes, depending on the size of the wings. Flip them over around the halfway mark. Toss in the garlic butter when they’re hot out of the air fryer!
I typically store leftover wings in an airtight container in the refrigerator. Reheat leftovers in the air fryer on 300ºF until the wings heat through. You can also heat them in the oven.
If you like this recipe, you might also like:
- Firecracker Chicken Meatballs
- Loaded Sheet Pan BBQ Chicken Nachos
- Crunchy Buffalo Chicken Jalapeno Poppers
- Sticky Baked Chicken Bites in Honey Sriracha
- Southwestern Egg Rolls with Avocado Cilantro Sauce

Super Crispy Garlic Parmesan Wings
Ingredients
- 2½ pounds chicken wings halved at joint
- 1 tablespoon baking powder aluminum free
- ½ teaspoon garlic powder
- ½ teaspoon kosher salt
- ¼ teaspoon black pepper
- ¼ teaspoon paprika
- 2 tablespoons chopped parsley
- 4-6 garlic cloves grated
- 5 tablespoons unsalted butter
- 4 tablespoons grated parmesan
Instructions
- IF TIME PERMITS: pat the wings dry with a paper towel. Combine the baking powder, salt, garlic powder, black pepper. and paprika in a bowl. Season the wings evenly all over. Then place a wire rack on a baking sheet and place the wings on the rack. Pop the rack into the bottom shelf of your refrigerator. Doing this overnight yields best results, but even 45 minutes to an hour helps! Make sure to remove them from the fridge 30-40 minutes before baking.
- PREP: Position a rack in the upper third of the oven. Preheat the oven to 450ºF. Line a baking sheet with foil, then place a wire rack on top of the baking sheet. Spray the wire rack with cooking spray to keep the wings from sticking to it.
- SEASON: If you didn't season the wings the night before, pat the wings completely dry using paper towels. Combine the baking powder, salt, garlic powder, black pepper, and paprika together in a bowl. Sprinkle this over the wings to coat them evenly on both sides.Place the wings skin side up on the wire rack.
- BAKE: Bake the wings for 28-38 minutes, depending on the size of the wings, flipping them after the first 18 minutes until they’re golden and cooked through. See notes for air fryer directions.
- GARLIC PARMESAN: When the wings are almost done, add the butter, garlic, ¼ teaspoon salt, and parsley to a small bowl, and zap in the microwave until the butter melts. Transfer the wings to a large bowl, drizzle with the garlic butter and toss to coat all the wings evenly in the garlic butter. Sprinkle with parmesan and continue to toss until evenly coated. Plate and serve warm!
Notes
- Air fryer: Preheat the air fryer to 400ºF, when hot add a single layer of wings (making sure to not overcrowd the basket. It’s better to do this in batches than all at once!) Bake for 16-22 minutes depending on their size, flipping the wings around the halfway mark. I usually let them go slightly longer with the skin side up for more color!
Nutrition
Nutrition information is automatically calculated, so should only be used as an approximation.
Like This? Leave a comment & rating below!


This is really good! Never knew baking powder is the trick! Thanks
Happy to hear you liked them! Thanks for taking the time to swing by and leave a review 🙂
Can I use Romano cheese instead of parm?
Soggy. Not crispy.
Better off after cooking just add garlic powder and parmesan cheese right after oven while hot.
Butter is the problem.
Bro, no butter. No good. If you had served immediately, you would have no problem. I will assume you thought to wait an hour before consuming. Poor choice, or poor cook. Take your choice. I think both is your problem
These look amazing! I was wondering if you had any tips on how to transport these without them losing the crispness and getting soggy. It’ll just be a 20 minute drive, but should I cover with foil and add vent holes? Thank you!
Thank you for this recipe! We have a huge family and buying garlic parm wings for everyone is way too expensive! I’ve made these a few times now and they are delicious!! Everyone loves them!!
I didn’t have any garlic cloves but the recipe came out so good!!! ❤️❤️❤️❤️
Great wings recipe! Got a 10/10 from my wife, crispy, tasty, definitely making these again