This post may contain affiliate links. Please read our disclosure policy.
The easiest thumbprint cookies you’ll ever make! Lightly sweet, shortbread cookie-style dough filled with your favorite jam. These cookies are melt-in-your-mouth delicious, and the icing on top is completely optional. My jam-filled thimble cookies require just 6 ingredients and are ridiculously easy to make!

Cookies, Cookies, Cookies!
And today’s recipe is a shortbread thumbprint cookie. Buttery, melt-in-your-mouth, lightly sweet, and perfect little bites of heaven coming out of the oven. I don’t think there’s anyone that could resist these.
Shortbread cookies are always welcome at our house, and they fly off the place in 2.5 seconds every. single. time. With a prep time of around 15 minutes, they are almost too dangerous. Buttery, sugary, jam-filled, glazed, fruity, and perfect for holiday gift-giving. This is what a great shortbread cookie should be.
I love shortbread in any form, be it these thumbprint cookies or a good slice-and-bake shortbread cookie. My favorite are the Twix kind topped with melted caramel and chocolate – basically a Twix bar in cookie form.
When I was something nostalgic, classics like these thumbprint cookies do it for me. My family has been making them for close to three decades, and nothing screams Christmas to me like these do! And we all know calories don’t count when it comes to Christmas cookies!
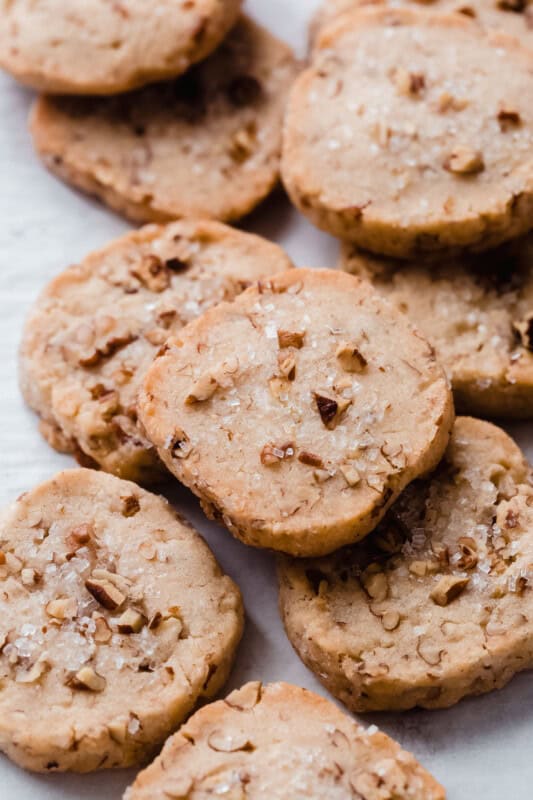
My family’s recipe for thumbprint cookies calls for the dough to be dipped into egg whites and then dunked into a bowl of chopped pecans or walnuts. I absolutely love them, but sometimes you want a little icing on top and skip the nuttiness!

Ingredients for thumbprint cookies:
- Butter: You’ll want to use softened, room temperature butter for this recipe. I like to use salted butter because I prefer the cookies to be slightly less sweet. However, unsalted butter will also work for this recipe. You can also add a ¼ teaspoon salt if you only have unsalted butter on hand.
- Granulated Sugar: Adds sweetness to the recipe. We’re using a lot less sugar in this recipe than we would in typical cookie recipes, but this is because most of the sweetness comes from the preserves we’ll use in the center of the cookie dough.
- Egg Yolk: You’ll need one large egg yolk for this recipe. The protein in the egg yolk prevents too much gluten from developing in the cookie recipe. This leaves you with a more delicious crumbly, and tender cookie.
- Vanilla Extract: I like to use a splash of vanilla extract, but if you have vanilla bean paste on hand, you could also use a bit of that. If you’re a fan of almond extract, you can also use a combination of vanilla and almond.
- All Purpose Flour: A typical ingredient in most cookie recipes.
- Raspberry Preserves or Apricot Jam: Strawberry, apricot, and raspberry jam work for this recipe. If you aren’t a fan of jams or preserves, you can also use lemon curd in place of the jam.
- Confectioners Sugar: We’ll use the confectioners or powder sugar to make a glaze to top the cookies with. Drizzle the glaze on top of the cookies once they have cooled.
- Milk or Half and Half: Use a tiny splash of milk or half and half, along with the powdered sugar, to make a glaze for the cookies.


Making Shortbread Thumbprint Cookies:
- Beat the ingredients. In a bowl of a stand mixer fitted with the paddle attachment, you’ll want to cream the butter and sugar together until it’s light and airy.
- Add the remaining ingredients. Once the butter is fluffy and light, add the egg yolk and continue to mix together before adding flavor with the vanilla. Stop the mixer and scrape down the sides of the bowl. Fold in the flour using a rubber spatula or run the paddle on the lowest setting until the flour is incorporated.
- Let it rest. Once the dough comes together, chilling it is essential for the recipe. The total time of this recipe is mostly the chilling time. Otherwise, this recipe comes together extremely quickly! Chilling allows the dough balls to hold their shape better when they bake in the oven. Cover with plastic wrap and allow the dough to hang out in the fridge for a few hours.
- Preheat the oven and shape the dough. Line a baking sheet with parchment paper, or use silicone mats. Using a cookie scoop or a tablespoon, shape the dough into 1-inch balls. Indent your thumb in the center of the dough ball. Then place the cookie dough balls on the cookie tray and bake them for a couple minutes so that the dough softens.
- Fill and bake. Fill each thumbprint using a spoon with the jam. I like to do about ½ teaspoon of preserves per cookie. Bake again until the cookies are lightly brown around the edges.
- Cool and drizzle. Once the cookies are done, allow them to cook on a wire rack for 30-45 minutes or until they are room temperature. In a small bowl, combine the confections sugar, half and half, and ½ teaspoon vanilla extract. Once the glaze is smooth, drizzle it over the cookies with a fork or in a small piping bag. Let the glaze set before serving!

FAQs about this recipe
Yes, most thumbprint cookies are made using shortbread cookie dough as the base of the recipe.
Prepared cookies should be kept in an airtight container at room temperature for up to 3 days. You can also keep them in the refrigerator for up to 5 days or pop them in the freezer for up to 2 months.
Most likely, you didn’t use enough flour in the recipe. Cookies spread more when there isn’t enough flour to absorb the melted butter in the recipe.
Cookies crumble when there isn’t enough butter or liquid ingredients in the recipe or it could also be if you used too much flour for the amount of butter (or other liquid ingredients) in the recipe.

If you like these thumbprint cookies, you may also like:
- Raspberry Almond Linzer Cookies
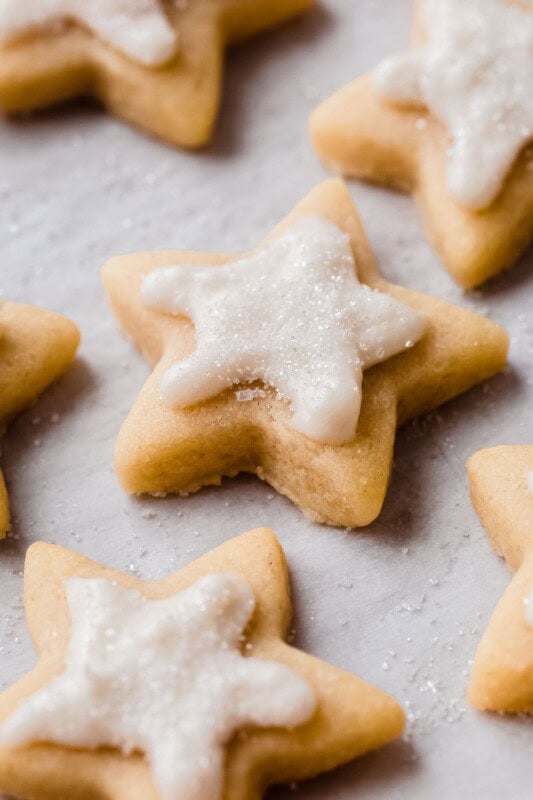
- The Best Cut Out Sugar Cookies
- Nani’s Pistachio Cardamom Cookies
- The Best Chewy Chocolate Chip Cookies
- Easy Maple Pecan Shortbread Cookies


Apricot Raspberry Thumbprint Cookies
Ingredients
Thumbprint Cookies:
- ½ cup salted butter softened to room temperature
- ¼ cup granulated sugar
- 1 egg yolk
- 1 teaspoon vanilla extract
- 1 cup all-purpose flour
- ¼ cup raspberry or apricot jam or any flavor
Glaze:
- ½ cup confectioners powdered sugar
- ½ tablespoons half and half or milk
- ½ teaspoon vanilla extract
Instructions
- CREAM: Add the butter and sugar to the bowl of a stand mixer fitted with the paddle attachment. Beat on high speed until creamy and whipped, about 2-3 minutes.
- ADD: Reduce the speed of the mixer to medium low, and add the egg yolk. Let it mix in before adding the vanilla extract. Once mixed, stop the mixer, scrape down the sides and bottom of bowl.
- ADD FLOUR: Turn the mixer off, add the flour. Turn the mixer on low and slowly allow the flour to mix in and forms a soft dough. It will be crumbly at first, but it will come together.
- SHAPE: Line a baking sheet with parchment paper or a silicone mat. Using 1 tablespoon of dough per ball, shape into round balls. Place 1-inch apart on the prepared baking sheet. Using a small melon baller or your thumb, gently make an indent in the dough.
- CHILL THE DOUGH: Place the baking tray in the freezer for 30-45 minutes or in a refrigerator for at least 1½ hours.
- PREHEAT: Position a rack in the center of the oven and preheat the oven to 350ºF.
- FILL: When the oven has preheated, remove the dough from the fridge or freezer. Using the same melon baller, fill each thumbprint with ¼ – ½ teaspoon of jam.
- BAKE: for 14-18 minutes or until very lightly browned around the edges. Do not over-bake. Allow cookies to cool for 10 minutes on the baking sheet before moving to a wire rack. Cool for 30 minutes before glazing.
- GLAZE (optional): In a small bowl, combine the ingredients for the glaze. Add more milk to get the right consistency if it doesn't drizzle back in the bowl. Drizzle over cookies with a spoon or piping bag. Glaze will need a few minutes to set.
Notes
- STORE: Keep cookies at room temperature for up to 3 days or in the refrigerator for 5 days.
- DOUBLE OR TRIPLE: Recipe can be doubled or tripled to make a larger batch of cookies. I recommend only baking one sheet pan of cookies at a time.
Like This? Leave a comment & rating below!


These cookies are so good!!! My new favorite!
Is there a way to pre make the dough? How long can it stay chilled or frozen for?
Followed the recipe exactly. Turned out perfectly. Very good
I want to make these for a baby shower. About howw many cookies are in one batch?
Hi Hannah! This recipe makes 1 dozen cookies. You can always find this information on the recipe card, right above the title 🙂
These are delicious. I didn’t drizzle with glaze this time but will try it next time. I made them with fig, blueberry, and raspberry jams. Hard to have just one.
I’ve made about 10 batches since discovering this recipe a few weeks ago. I. Am. Obsessed. Thank you so much for these deliciously simple cookies!!!
So glad to hear you like them! They are some of my favorite cookies of all time!
I just made these cookies and am enjoying them with a cup of tea right now. The taste of the shortbread itself is great but I don’t like the taste of the preserves I used. Do you have any recommendations of what brand to use? Also, are the cookies supposed to be soft or hard? Mine came out soft.
Any good quality preserves would work. Bonne Maman is a good brand. I’d say kind of in between? Soft in the center with crisper edges.
Feb 25 2015. I made the thumbprint cookies. Omg… They are awesome and so easy.
My grandma gave me the recipe for her cookies, that I treasured, when I was 12. That was 40 years ago. With my recipe locked up in storage, I had to call my cousin to get the recipe again. Boy, was I surprised grandma left out her secret ingredient in the recipe she sent me. According to my cousin ( and verified by my sister), my grandma put a thimble of Kentucky Bourbon in her dough.
Other than that, your dough recipe is the same. But instead of glazing, grandma sifted powdered sugar over the cookies when they were still warm. Oh, how I treasured her cookies. I used to beg her a couple times a day to let me eat one. Needless to say, I don’t make these often – I would eat way too many! I’ve tried all the jams you mentioned, but grape is still my absolute favorite.
Hi Jill,
Wow! I am shocked to hear that your grandma and I have the same recipe (aside from her secret ingredient, of course). This recipe is actually a family recipe of mine as well. My families recipe doesn’t actually have glaze either. Tweaked it to my own liking just a bit. Grape jam, really? I’ve never tried it with these cookies. Will give it a try with my next batch. Thanks! 🙂
I lover raspberry thumprint cookies! I always use almond extract instead of vanilla. 🙂
I can never decided whether I like the almond extract or the vanilla better! You can replace the vanilla with 1/2 teaspoon of almond extract for these cookies, if you’d like 🙂