Easiest No-Bake Nutella Pie
The best chocolate pie you’ll ever have! This no-bake Nutella Pie has become an instant favorite! Just a few ingredients but wow is this pie amazing!

Quite possibly the best dessert I’ve ever made.
This Nutella pie hasn’t even made its debut out into the world, and already all the members of both of our families have fallen completely head over heels for it.
When I was a kid, my parents would take us all to Bakers Square on the weekends and let us pick out a slice each of our favorite pie. It’s one of my fondest childhood memories. Can you guess which one I got? The chocolate pie, of course. When I sent some of this over to my parents, both of them remarked how similar it was to the chocolate pie from Bakers Square. I can’t for the life of me remember what it tastes like now. But I’ll take my parent’s word for it.
Whenever I’m testing a dessert recipe, I have two goals: 1.) make it easy 2.) get it out of the house as quickly as possible. This Nutella pie was nearly impossible to part with because it’s so good that I’d catch myself walking back to the refrigerator every 10 minutes to sneak a bite. Did I attend an extra session at Orange Theory that week? Most definitely.
The first time I made this pie, I have to be honest, I didn’t think it would be as good as it was. It was just too simple, you know? Two ingredient crust. Five ingredient Nutella pie filling? I had low expectations. So you can imagine my surprise when the crowd went wild!
But don’t take my word for it. You’ve got to try this one for yourself.
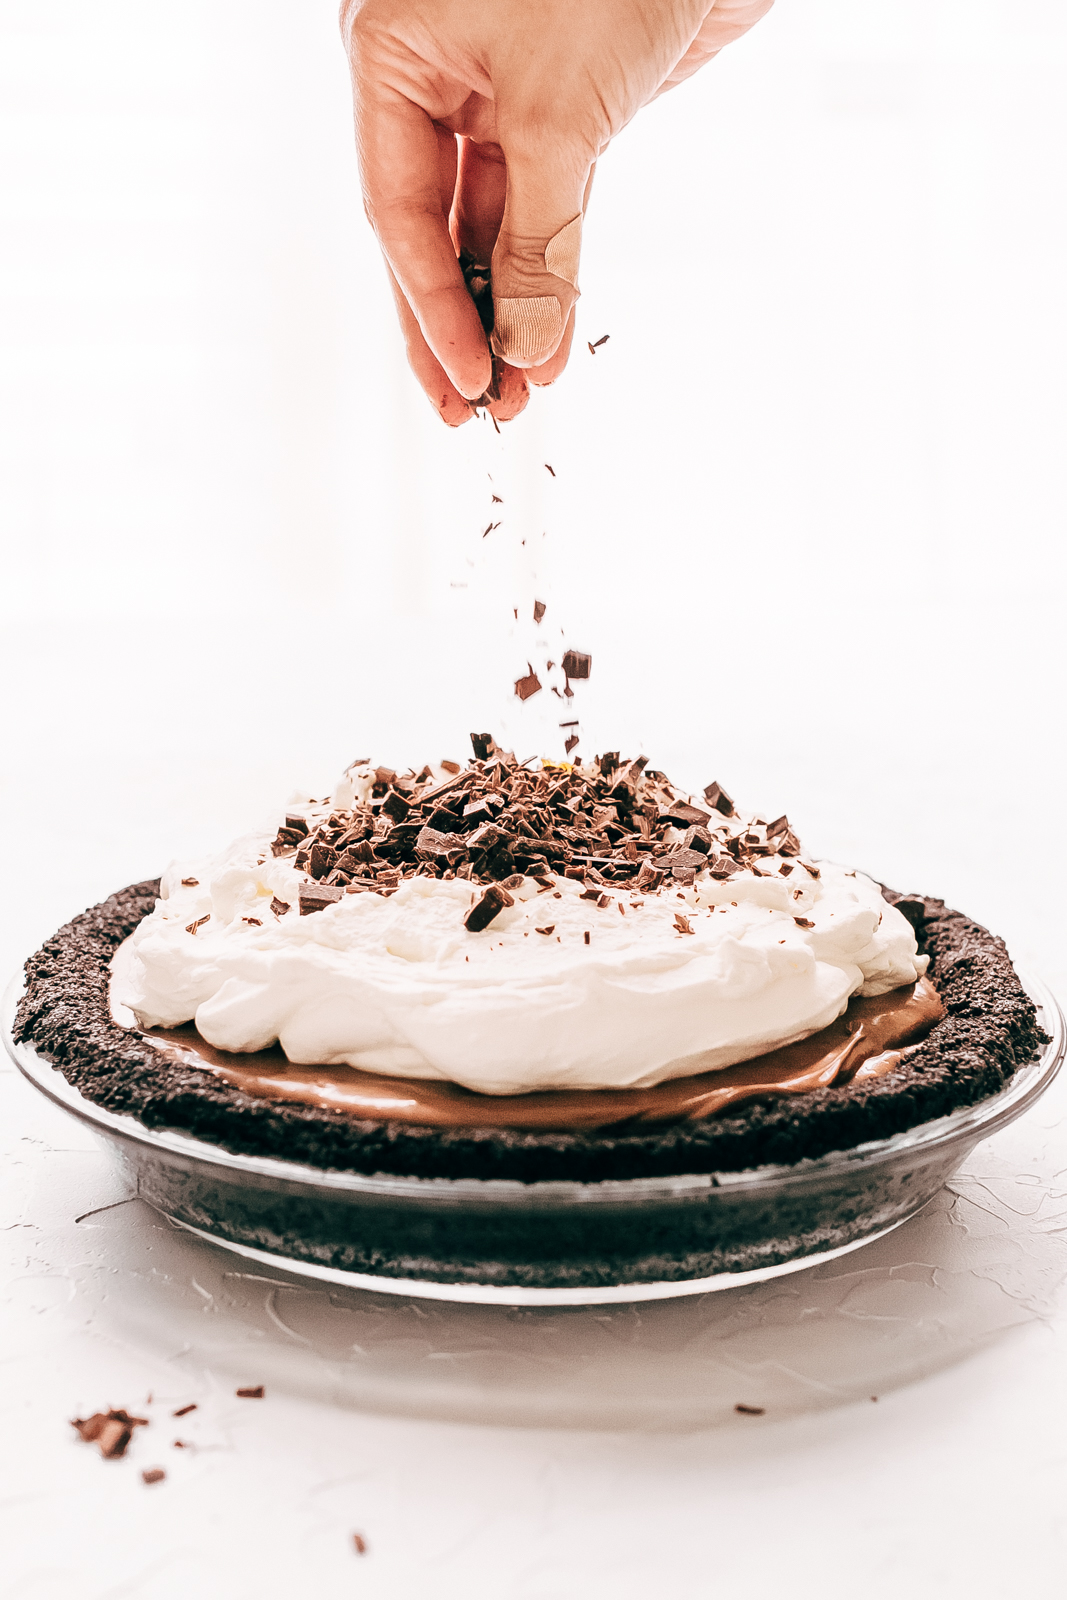
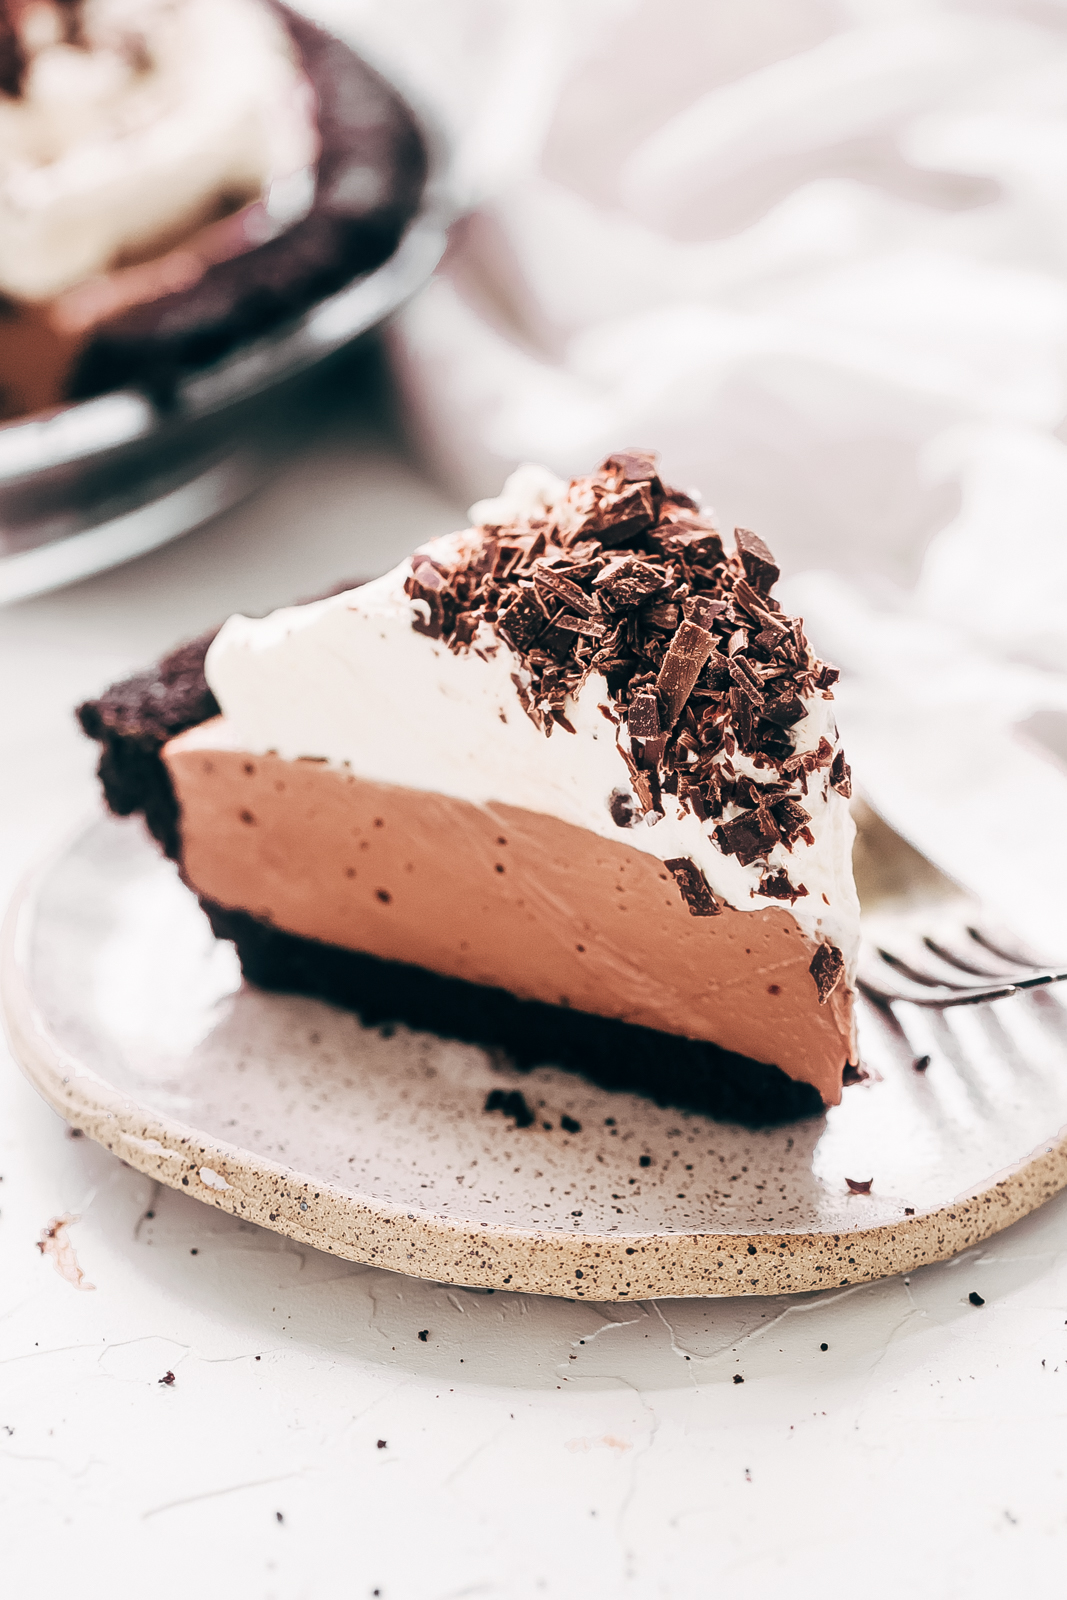
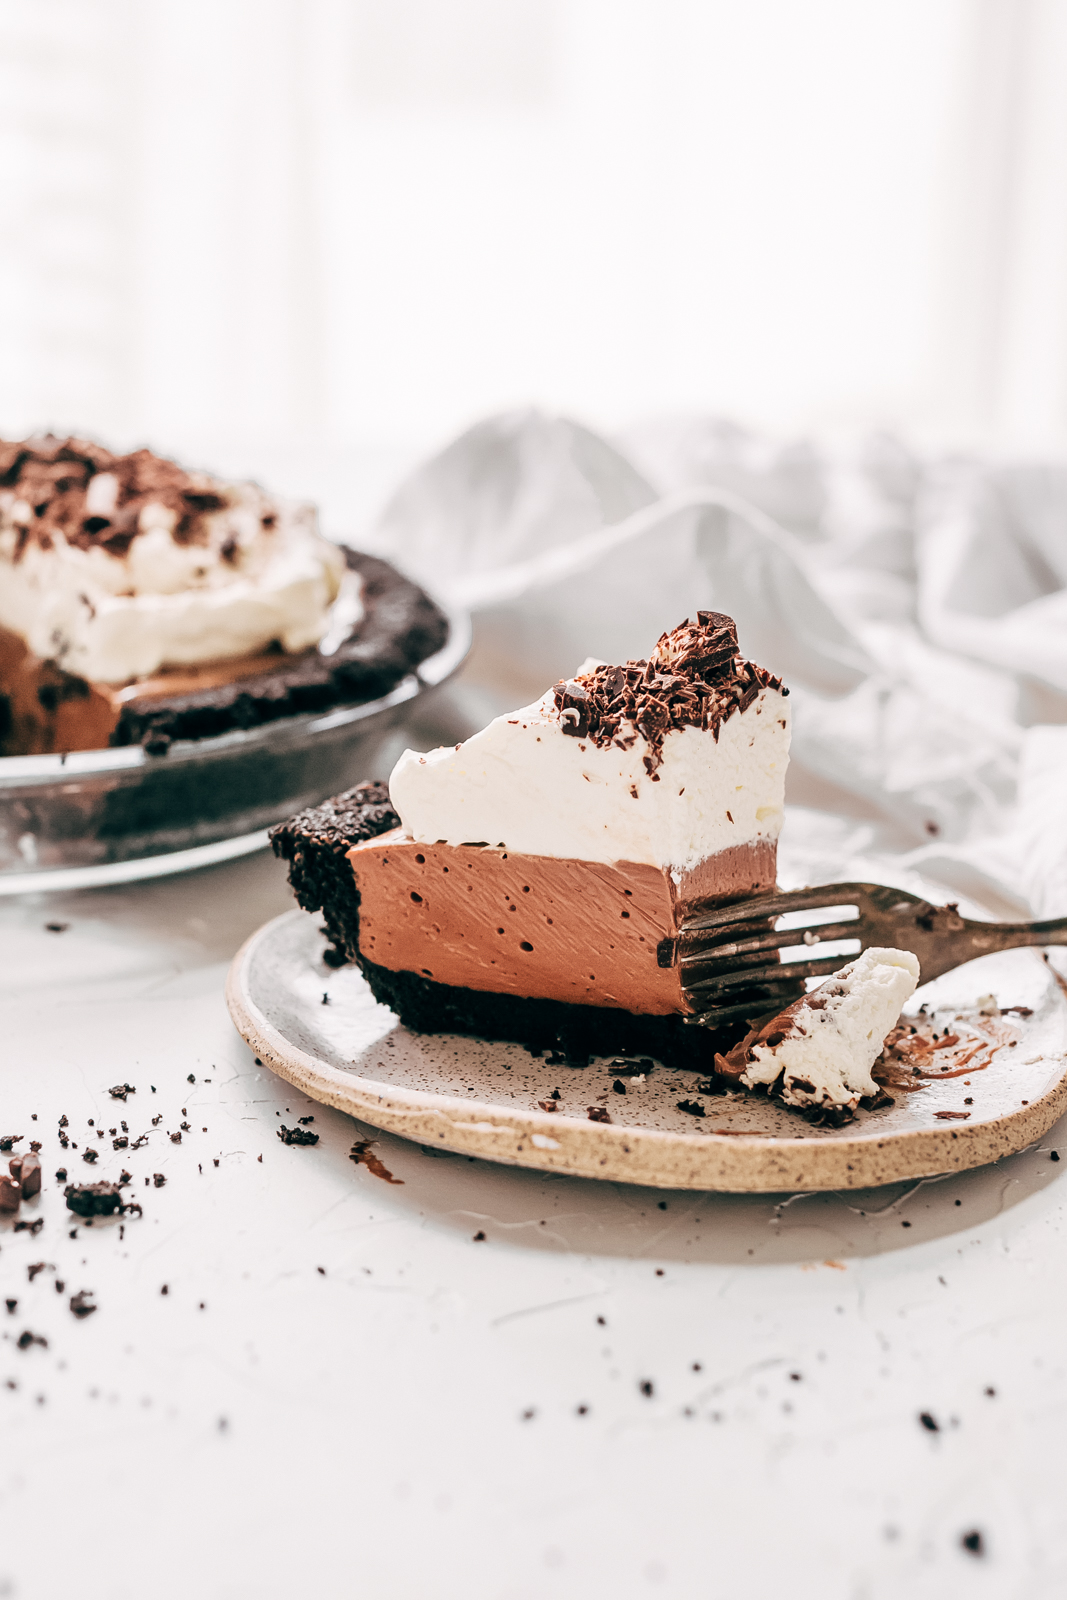
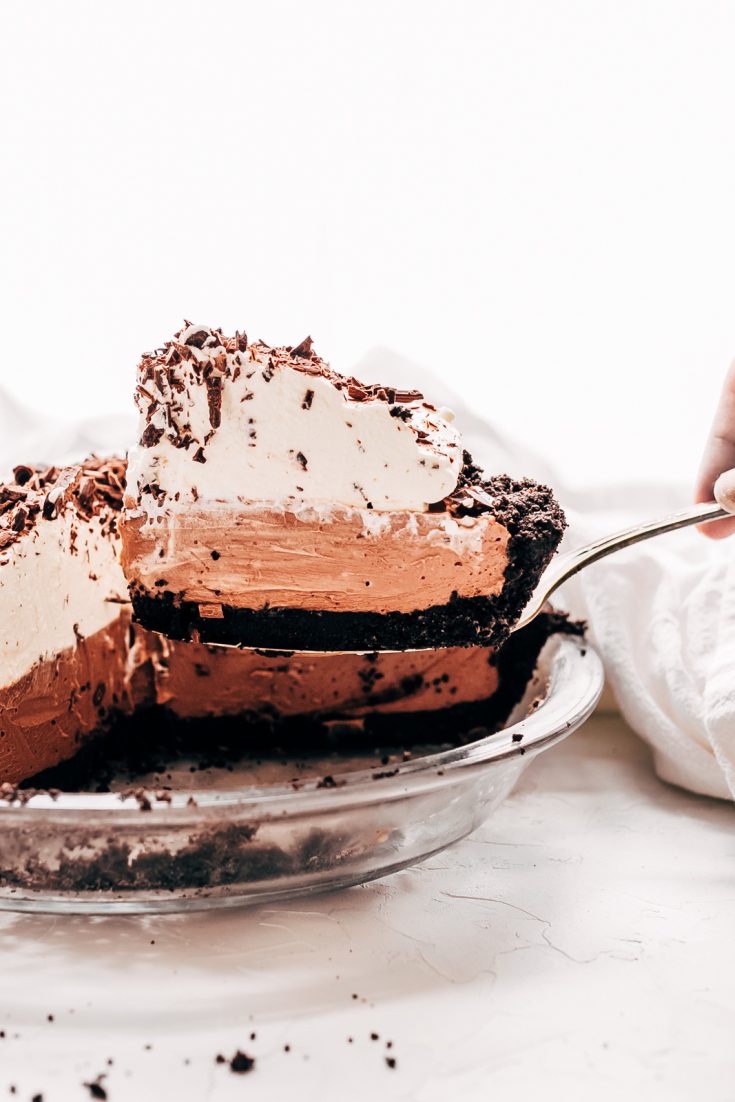
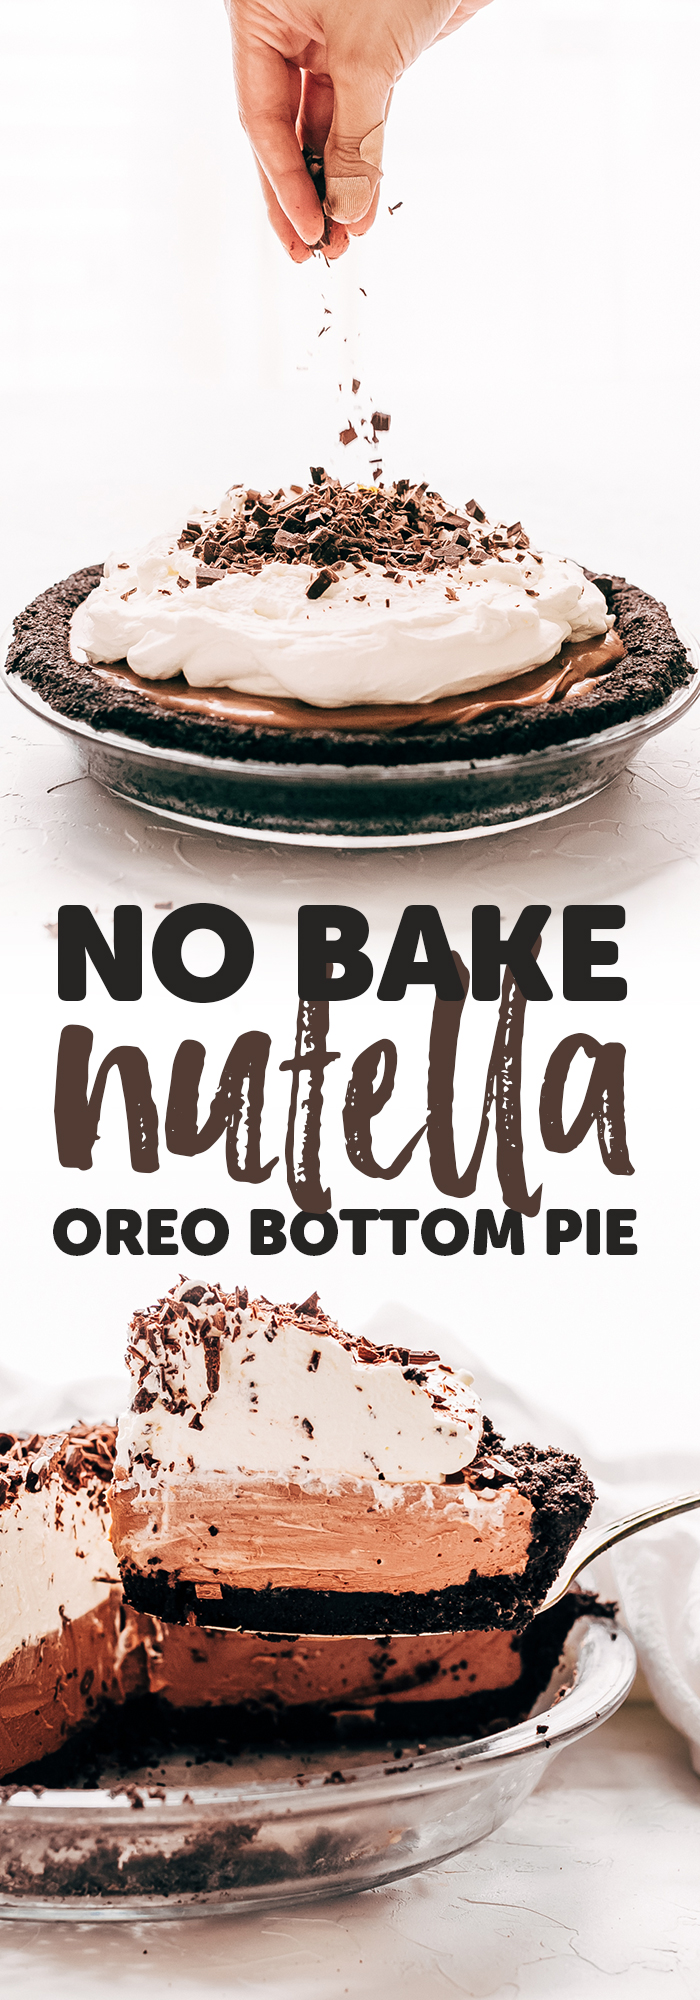
As if the oreo bottom and the Nutella center wasn’t enough, we’ll top our easy-peasy pie off with a generous dollop of whipped cream and chocolate shavings. Confession: 99% of the time I’m grating a bar of chocolate I’m doing it to make it look like I put a ton of effort into it when it’s quite the opposite. My Nutella pie doesn’t really need it but boy does it look good with them on top!
Moving along.
The temps in Texas have been at an all-time high. Earlier on in the week, they announced on the news we’re having a ‘front!’ No, they couldn’t claim it was a ‘cold front.’ Because we were still well in the 90’s. But a ‘front’ it was. One evening it was almost possible to stand outside without feeling like your toes were going to burn off! So YAY!
Needless to say, I’m not turning on the oven until and unless I really, really have to. This is where the inspiration, or rather desperation, for this no-bake Nutella pie stems from. It’s perfect for summer entertaining because the fridge/freezer is all you need to get this pie to set up. But can I also say that it’s great for Thanksgiving and Christmas for those of us that don’t bake!
No baking involved here.
How to make the crust for our no-bake Nutella pie:
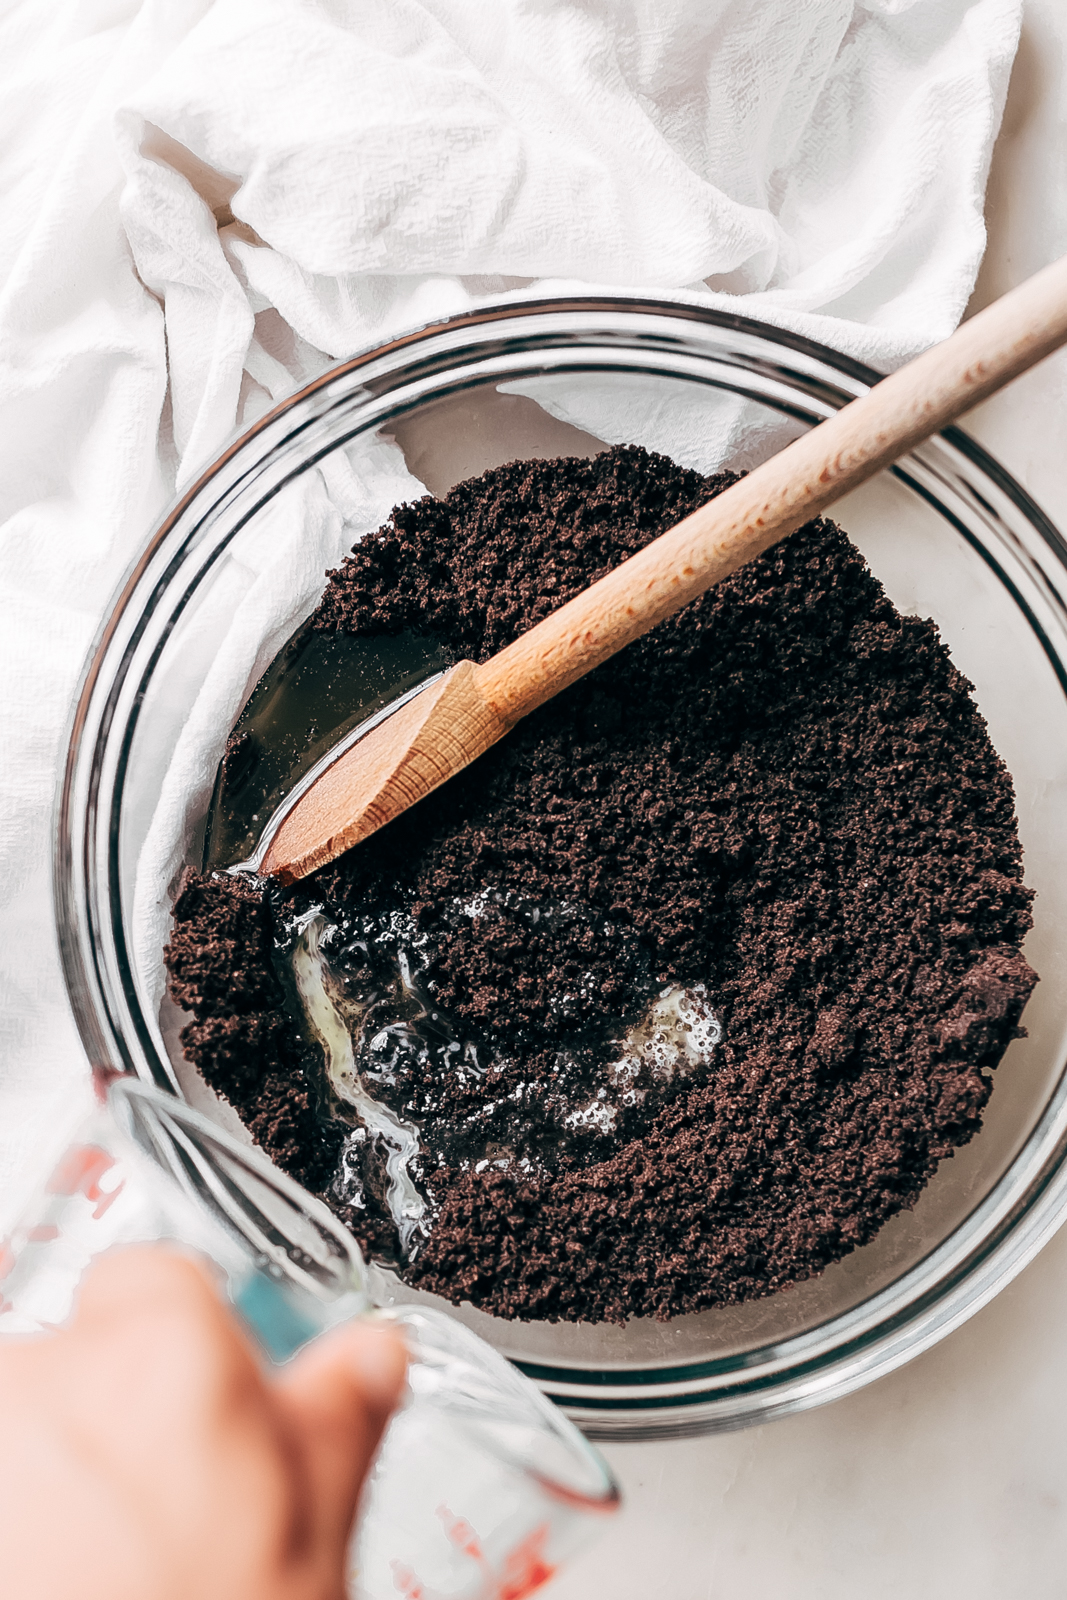
- The recipe starts with crushed Oreos. Give it a good few pulses in the food processor until they turn into a fine crumb. Make sure there aren’t any big pieces!
- Then we’ll melt some butter and toss it together with the crumbs until all of them are well coated. Once that’s done you’ll need a 9-inch pie pan to press them in.
- This is the pan (affiliate link) that I use. I like to give it a spray with nonstick cooking oil before I dump the crumbs in and press them.
- TIP: Spray the bottom of 1/2 cup measuring cup or the flat bottom of a glass jar and use it to help firmly pack in the crumbs. Super important to do this because if you don’t pack in the crumbs really well, the crust may fall apart when you’re slicing the pie.
- Now just let the pie crust hang out in the freezer for 10-15 minute while you prepare the filling.

What you need for the Nutella Pie Filling:
- softened cream cheese
- chocolate hazelnut spread (like my homemade kind)
- vanilla extract
- salt
- whipped dessert topping (such as cool whip)
How to make the Nutella pie filling:
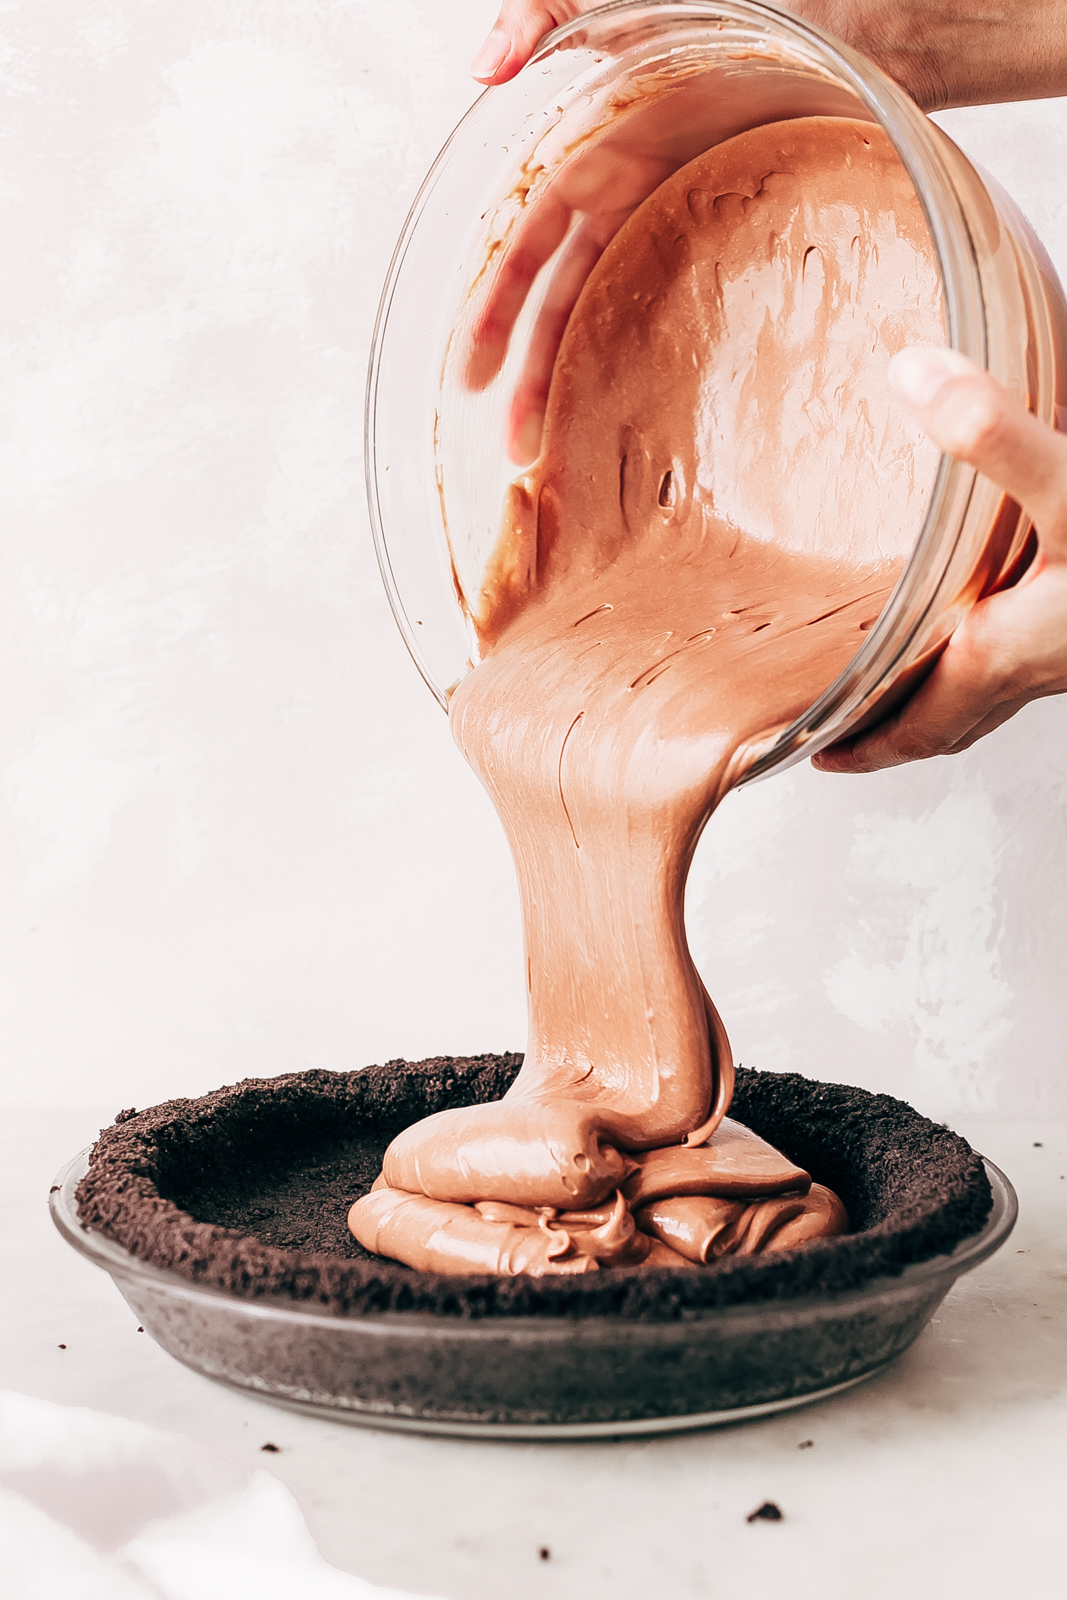
- We’ll use an electric mixer to loosen up the cream cheese.
- We’ll add the Nutella, vanilla, and salt and let it mix a little longer.
- Mix in the whipped topping.
- Pour it into the pie crust and smooth out the top.
That’s essentially all the hard work, and it wasn’t even hard!
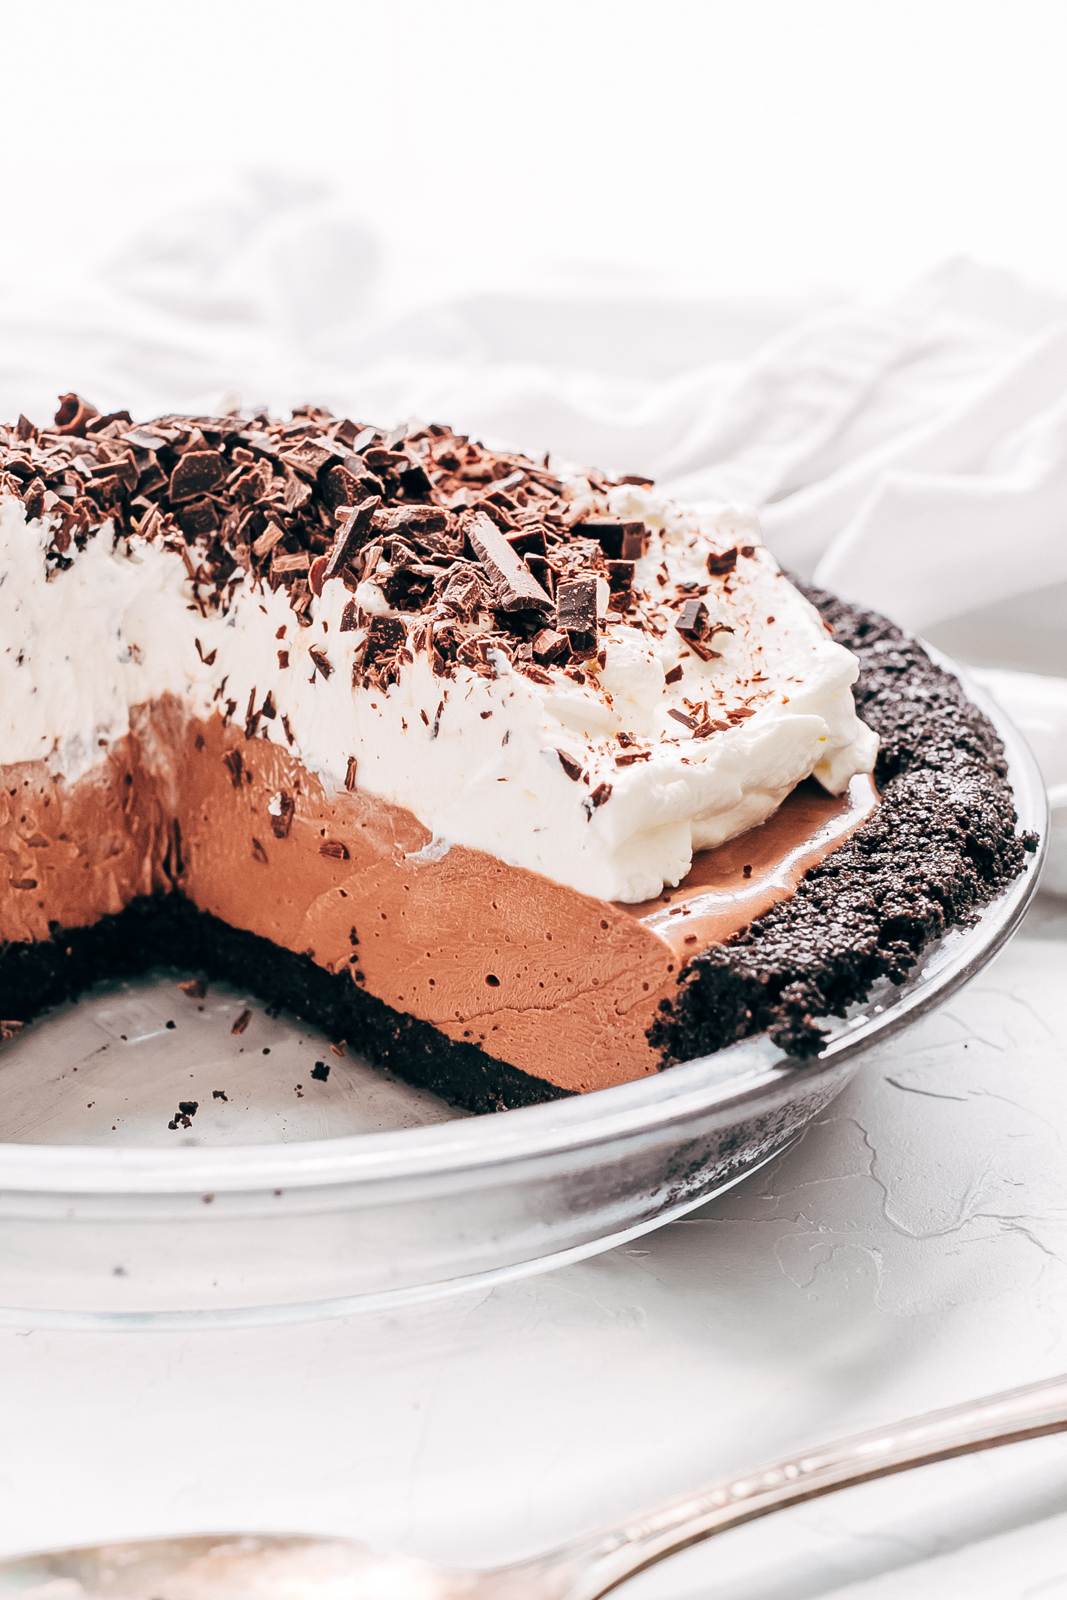
Now, of course, you can get as fancy as you like with this Nutella pie. I topped the whipped cream with chocolate shavings. It’s just a cold bar of chocolate meets a peeler. But there are other things you can use too like chopped hazelnuts and a drizzle of melted chocolate or even a few more chopped up chocolate Oreos on top.
Decorate it however you like!
Can I just say that homemade Nutella Pie is going to become your go-to summer dessert recipe?
Oh yes, it is!
Easiest No-Bake Nutella Pie
The best chocolate pie you'll ever have! This no-bake Nutella Pie has become an instant favorite! Just a few ingredients but wow, is this pie amazing!
Ingredients
Oreo Crust:
- 1 (14.3-ounce package) chocolate sandwich cookies (such as Oreos)
- 5 tablespoons salted butter
Chocolate filling:
- 1 (8-ounce package) cream cheese, softened to room temperature
- 1 ½ cups chocolate hazelnut spread (homemade
- 1 teaspoon vanilla extract
- ½ teaspoon kosher salt
- 6 ounces whipped dessert topping (such as cool whip)
Whipped cream:
- 1 ½ cups heavy cream
- 2 tablespoons granulated sugar
- Chocolate shavings, for topping
Instructions
- CRUST: pulse the chocolate sandwich cookies in a food processor until they break down into a fine crumb. Place the crumbs in a medium bowl and pour the melted butter on top. Mix together using a rubber spatula so all the crumbs have a chance to get coated in the butter. Dump the sand-like crumb mixture into a 9 or 10-inch pie plate. Make sure the crumbs are packed firmly into the bottom and up the sides of the pie plate. I like to use the bottom of a measuring cup sprayed with nonstick spray to help pack in the crumbs! This is super important so that the pie crust holds together when you slice it. Place the plate in the freezer for 10-15 minutes while you prepare the filling.
- FILLING: using an electric mixer, whip the cream cheese with the whisk attachment for 30 seconds just to loosen it up. Add the chocolate hazelnut spread, vanilla, and salt and continue to whip for 1-2 minutes or until well combined. Stop the mixer, scrape the sides using a rubber spatula and add the whipped dessert topping. Turn the mixer back on medium-low just long enough for everything to combine. Pour the filling into the prepared pie crust. Smooth out the top and refrigerate for at least 4-6 hours before serving (you can easily make this further in advance as well.) To serve soon after making, freeze the pie for 1 hour, top with whipped cream (optional) and refrigerate.
- WHIPPED CREAM: Pour the cream into a large bowl and sprinkle with sugar. Beat the cream using an electric mixer for 1-2 minutes or until the cream forms stiff peaks. Be careful not to over beat otherwise you’ll end up with butter! Spread or pipe the whipped cream onto the pie and top with chocolate shavings.
Notes
- If you don’t have salted butter, just add ¼ teaspoon kosher salt to the crust.
- If it’s particularly hot when you're making this, I suggest freezing the bowl and beaters for the whipped cream for 10-15 minutes before whipping the heavy cream.

I just got back from Europe where Nutella was HUGELY popular and in everything! Croissants, crepes, gelato, etc. This looks insanely delicious! 🙂
This looks delicious! Can you make this the night before it needs to be served? Thank you!
Yes, absolutely! I just would add the whipped cream on top the day of as that will deflate a bit if done the night before. Hope you enjoy this, it’s one of our faves!
14.3 ounce package of Oreos? Is that correct?
Yes, that’s correct.
Just the cookie part of the Oreo, or the while Oreo?
The entire Oreo!
This looks so good! I also would have to get it out of my house asap and my son-in-law is on Keto so I am trying not to tempt him at the moment but will be making it as soon as I can. I will change it a bit and use chocolate pudding instead of Nutella as my hubby has nut allergies. I make a mousse dessert using pudding with Cool Whip so I think that would also work for this pie. Will give it a try.
can I use chocolate wafers instead of oreos….there is no cream with these