Homemade Flour Tortillas
Just five simple ingredients to make the best homemade flour tortillas. This authentic flour tortillas recipe produces soft and tender tortillas that you can make to use with tacos or burritos. You can even freeze them for later!

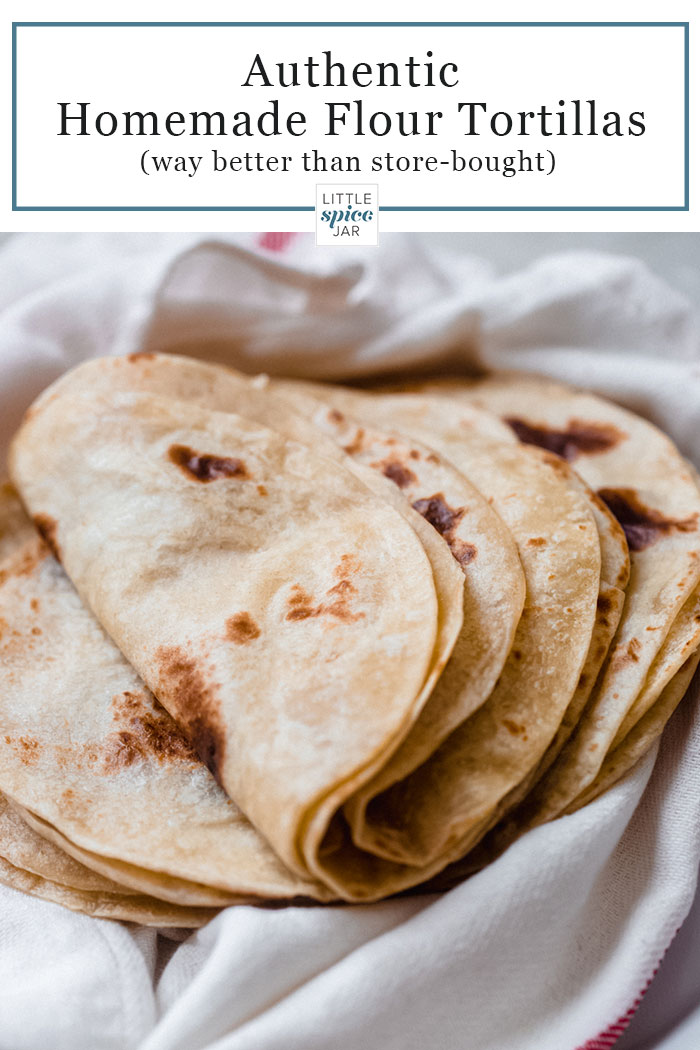
Soft and fluffy authentic flour tortillas make your taco night that much more delicious.
I’m talking about warm, fluffy authentic Mexican tortilla hot off the pan. The kind that has those dark bubbles blistering up from a hot pan. If I’m at a Mexican restaurant 9 times out of 10 my answer is flour when the waiter asks if I want flour or corn tortillas. I love a good corn tortilla too. But that soft, fluffy goodness that is a flour tortilla is perfect with fish tacos, enchiladas, loaded burritos, and of course, how could I forget my migas breakfast tacos?
We celebrate Cinco de Mayo on a weekly basis in Texas! And calories don’t count! Speaking of, Cinco de Mayo is as BIG here! I mean, we like our salsa fresh, our fajitas extra flavorful, taquitos have to be extra crispy, our agua frescas are cold and refreshing, our quesadillas have to be cheesy, sometimes we throw avocados into our salsa to make it creamy, we like our street corn with extra toppings, and our flour tortillas without a doubt, have to be tender.
This is unquestionably one of the best things about living in Texas!

Ingredients for homemade flour tortillas:
- All-purpose flour/bread flour: I tested the recipe with both types of flours, and both do work here. All-purpose flour did work slightly better, in my opinion, as bread flour develops more gluten and gives you a chewier or more elastic tortilla at the end. I haven’t tested the recipe with whole wheat flour so I’m unsure how that would go. I’d suggest starting with a 50:50 of all-purpose and whole wheat and working your way up from there if this is something you’d like to try.
- Kosher salt: helps flavor the tortillas. We’ll use 1 1/4 teaspoon salt for this recipe.
- Baking powder: is used to lighten the texture of the tortillas. The carbon dioxide released into the tortilla helps make them light and airy. Don’t worry, you won’t even be able to tell it’s there!
- Shortening or softened butter: either vegetable shortening, coconut shortening, or softened butter would work for this recipe. I tested the recipe with both and found that the butter tortillas did have a slightly better flavor, However for my dairy-free friends, shortening works perfectly! You could even use vegetable oil. But if you do, you want to keep in mind that since oil is in a liquid state, you’ll need slightly less than if you were to use butter/shortening. A lot of authentic tortillas recipes also use lard. This isn’t something we use in our home so it’s not something I’ve tested, but it should be a 1:1 swap with the butter.
- Hot water: You want to heat the water in a microwave to roughly 110ºF so that it’s warm but not hot! You want to still be able to touch and knead the dough. You can check the temperature of water by using a food thermometer I’ll explain below why we do so.

How to make authentic tortillas at home:
- Mix it together. The first step is to combine the dry ingredients in a large bowl. Add the shortening or butter in small pieces and use either a pastry cutter or the tips of your fingers to help blend the fat into the flour like a coarse meal. It’s the same way you would do so if you were making a pie crust. Then, add the hot water in and combine the dough. You could use a silicone spatula for this, but really your hands are your best tools here! When the dough somewhat comes together, dump it out onto a clean work surface. Bring it together and form a ball. Then, knead the dough for 10 minutes. I like to put on a good playlist, set a kitchen timer, and go to town. You’ll notice that at first, it’s difficult to work the dough, but around the 3-5 minute mark, all of a sudden, it comes together and becomes soft and supple. You could also do this in the bowl of a stand mixer and mix the dough with a hook attachment. I’ve also heard of people making the dough in a food processor. I’ve never tried this myself, so I’m unsure how that would go.
- Let the dough rest. Cover the dough with the same bowl (I hate wasting wrap if I don’t have to) or with plastic wrap and allow the dough to rest for 20 minutes.
- Roll out the tortillas. On a clean floured work surface, divide the dough out into 14 equal portions. You can use a food scale if you want to be super accurate, but eyeballing it works just fine. Smooth out the dough balls and place them under a damp paper towel. Grab the first ball you made and roll it out into a tortilla using a rolling pin. You can roll it to ⅛- ¼ inch thick depending on your preference. Keep in mind that the baking powder does help them puff up a bit so you don’t want to go too thick here; otherwise, it’ll be more of a naan than a tortilla! While you’re rolling out the first tortilla, heat a cast-iron skillet over medium heat.
- Cook them. When the skillet is hot, add a tortilla to it. Allow for it to cook and start bubbling up on one side before flipping it over. You want the first side to develop golden brown spots before flipping it over. If at any point you find the tortillas are getting more chard than your liking, toggle the heat setting. I have to go back and forth between medium and medium-high heat, heating it up and cooling it down so that they don’t get too charred. Keep the tortillas wrapped in a clean kitchen towel placed inside a tortilla warmer while you make the rest.

Why use hot water when making homemade tortillas:
The hot water helps melt the shortening, which then coats the flour when we knead the dough. Coating the flour in shortening helps prevent too much gluten from developing when you mix water and flour. Since the flour is coated in melted shortening, it’s like it’s waterproof. So when you knead the dough to make tortillas, it minimizes the formation of gluten, which gives us a more tender tortilla.
The cheaters’ way of “rolling” out the dough:
My mom has had a tortilla maker for years! So when I was developing and testing multiple batches, I asked if I could borrow it to make my life easier. Though you can certainly use the tortilla maker for cooking the tortillas all the way through, I use it mostly to help press them.
A traditional tortilla press is a little trickier to use when making flour tortillas. It tends to work better with the corn variety. This one heats up, so it keeps the tortillas from sticking. However, you still need to spray or brush it with oil every other tortilla and you have to be super fast with it so that it just quickly presses them, and you move right to the skillet to cook them. Allowing them to sit sometimes doesn’t let them puff up when you cook them on the skillet.
The good thing about using a tortilla maker as a press is that you almost ‘flash cook’ the tortilla, so they hold their shape very well. I’ve made a ton of them and frozen them between sheets of wax paper. So now I just defrost them overnight in the fridge and cook them in a skillet fresh when I’m making tacos.
They totally take your taco game to the next level.
Can you store/freeze flour tortillas?
Yes! You can roll them out, freeze them in between sheets of parchment paper/ freezer paper, and then prepare them fresh right before serving. You can also cook and freeze tortillas. Again do so between sheets of wax/freezer paper so it’s easy to take them apart. Spritz with water and reheat them in a warm skillet!
You can also cook and refrigerate the tortillas up to 3 days in advance. I usually place a piece of large foil (large enough to cover all the tortillas and wrap), then place a piece of paper towel on the bottom of the stack and one on top before wrapping in foil. This keeps them fresh. Reheat the same way with a spritz of water!

Tips for making the best tortillas:
Put on a good song, set a kitchen timer, and knead that dough. It’s going to look super crumbly for the first few minutes, but after the initial 4-5 minutes, you’ll notice the dough gets somewhat shiny and elastic. If you find the dough is just way too wet, you can add an additional tablespoon of flour. But this is a slippery slope, only add it if it truly needs it! If anything it’s better if the dough is slightly wet. when you roll it out on a lightly floured surface, it should get enough flour to where it’s no longer sticky.
This allows any gluten protein that has developed to relax. The dough will noticeably be soft and supple once it’s rested. That way, when you portion the dough to roll it out, it won’t snap back on itself!
Overcooked tortillas will become hard or ‘crunchy’ around the edges once you’ve pulled them off the cast iron skillet.

If you like this recipe, you might also like:
- 2 Ingredient Naan Flatbread
- Easy No Knead Bread
- One Hour Garlic Herb Dinner Rolls
- Swirled Nutella Banana Bread
- Roasted Garlic Rosemary Focaccia
- Homemade Honey Oat Bread
- Jalapeño Cheddar Bread
- Garlic Irish Cheddar Chive Soda Bread
- Homemade Cinnamon Swirl Bread

Homemade Flour Tortillas
Just five simple ingredients to make the best homemade flour tortillas. These authentic flour tortillas are soft and so tender, and you can even make and freeze them for later!

Ingredients
- 3 cups all-purpose flour (or bread flour, see post)
- 1 ¼ teaspoon kosher salt
- ½ teaspoon baking powder
- ¼ cup vegetable shortening or softened butter (see notes)
- 1 cup hot water (110ºF)
Instructions
- MIX: Whisk together the dry ingredients with your hands or with a whisk. Add in the shortening using a pastry cutter, or you can rub the shortening into the flour using your fingertips. Just work the fat into the flour until it resembles a coarse meal. Add the hot water and combine with your hands. When the dough is shaggy and somewhat combined, dump it out onto a clean surface. Bring it together to form a ball. Then, set a timer for 10 minutes and knead the dough until it’s soft and supple. It’ll feel like it’s not soft right away, but once you hit around 4-5 minutes of kneading, you’ll notice the dough softens and much easier to work with.
- REST: Cover the dough with a bowl or with wrap in plastic wrap and allow the dough to rest for 20 minutes before proceeding.
- ROLL: On a clean work surface, dusted very lightly with flour, divide the dough into 14 equal portions. Roll the dough into smooth balls, place under a wet paper towel, or just cover with a tea towel. Grab the first one you rolled and roll it out into a tortilla using a rolling pin. Ideally, you want it to be ⅛ - ¼ inch in thickness depending on preference. But not thicker than that. Heat a cast-iron skillet over medium heat.
- COOK: Add the tortilla to the hot skillet and allow for it to start forming bubbles on the surface, this takes about 1 - 1 ½ minute. Once you see the bubbles getting larger, flip the tortilla over and allow for it to cook for an additional 20-30 seconds or until it’s done. You may need to turn the heat down once you’ve made a few tortillas as it gets really hot. Alternately, you can move the skillet off the heat for a few minutes and allow it to cool before proceeding.
Notes
- if using oil, use 3 tablespoons instead of ¼ cup.

These were super easy to make with ingredients I already had on hand and really yummy! I will definitely be replacing my store bought tortillas with these. Thank you!
So happy to hear you enjoyed the tortillas, Kearsten! Thank you again for taking the time to comment 🙂
So good! Used bread flour and olive oil. Soft and delicious:)
I thank you for the availability of this recipe. I ran out of A.P. flour looked online for alternatives. Your recipe fit my needs perfectly.
I like the recipes and hints, especially that the ingredients are so available. I will try the flour tortillas and beef fajita recipes at first opportunity. Will come back and rate afterwards. Thank you.
P. S. I grew up in South Texas, so my comfort food is Tex/Mex.